
Notes
Learn how to create notes in R2S.

Notes provide a simple way to capture and share information in R2S. By placing Notes in 2D or 3D views, you can record observations, changes, concerns, and other important project information exactly where it's relevant. Notes can be kept private or shared with other users, helping teams maintain context and improve communication.
Creating a Note.
- Right-click where you want to place the Note.
- Select Make Note.
- If the viewer splits into two images, have a look at the Point Selection in m360 guide to learn how to select a position for the Note.
- Adjust the position (if required) and press Next.
- Add a title to the card.
- Add a description (optional).
- Choose a Category from the dropdown list (if available).
- Select a visibility setting (by default this is Just me).
- Click the tick icon to save the Note.
Your Note will now appear as a marker in the 360 image, plan and in the point cloud.
Have a look through this quick interactive guide.
Tip: If you see a pop-up saying "This note can't be pinned to a location", please see the Adding Labels guide.
When you mouse over the marker, further information about the Note is displayed in a pop-out card.
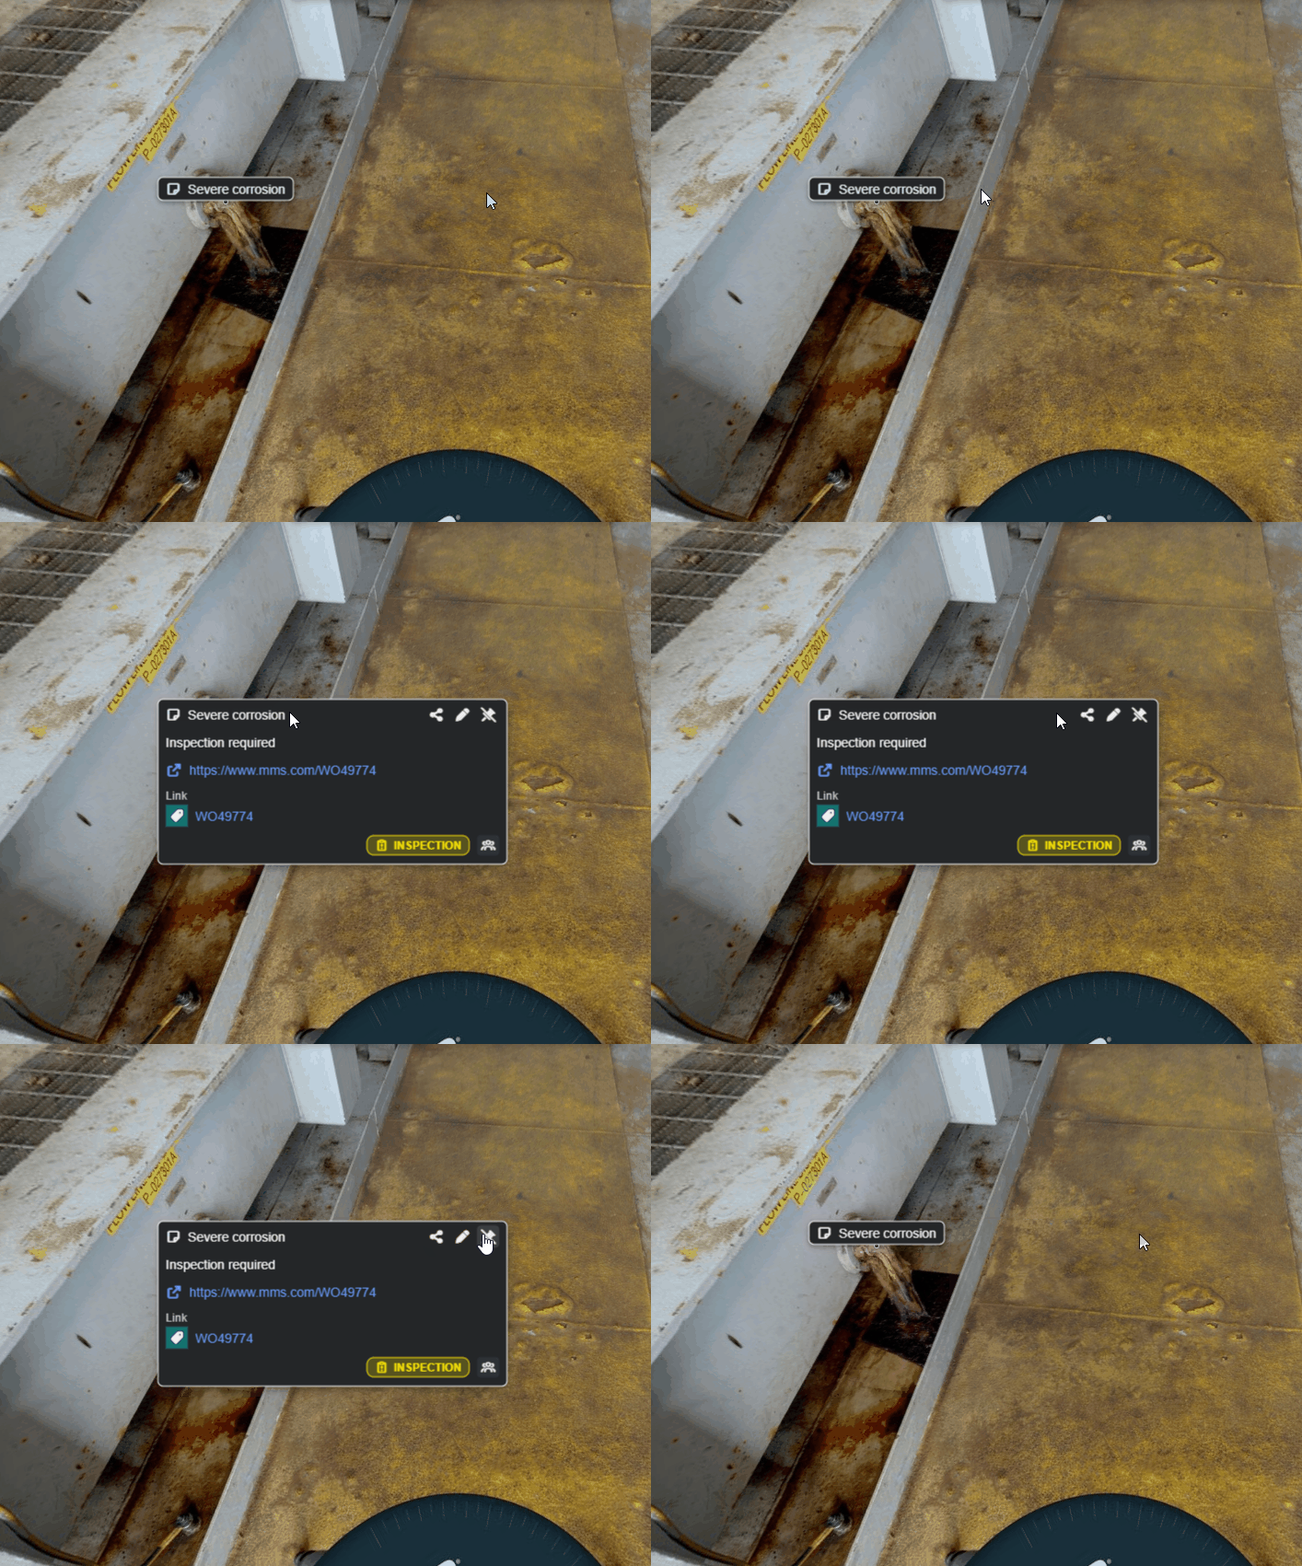
This card provides a few quick actions:
- Click the card to pin it in the viewer.
- Use the Share button to copy a link to your clipboard.
- Access linked Tags, Tasks and URLs.
- Click the pen icon to open the Quick Edit card.
Editing Notes
After creating a note, you can edit its contents and access additional features, such as locking the note or linking it to a tag or URL.
- Mouse over the Note marker.
- Select the Pen icon.
- Update the Note's name, description, category, and visibility directly on the card.
- For further editing options, select Advanced to open the Annotation Panel.
The Note can also be deleted entirely from the Quick Edit card (unless it's locked).
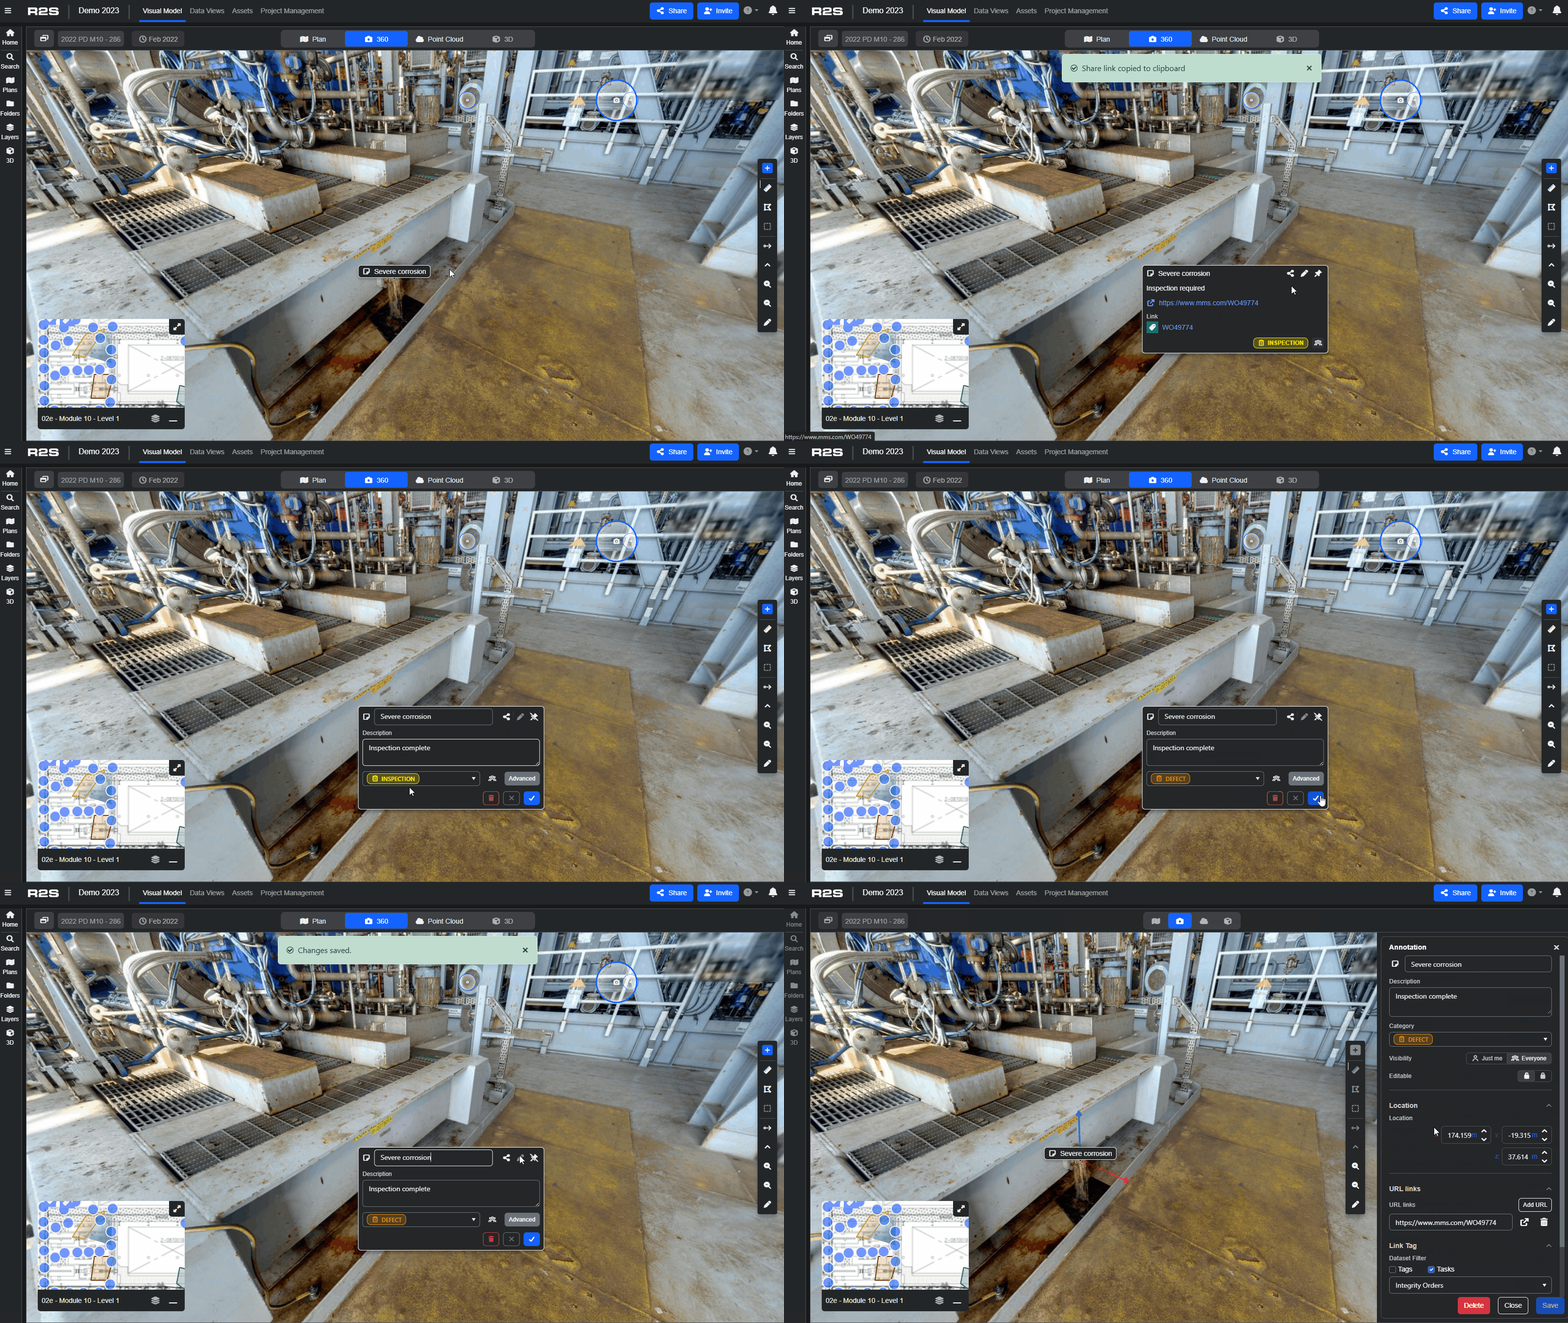
Tip: You can also go into Edit Mode by right-clicking directly on the marker and selecting Edit Markup or by selecting it from the Tag Panel.
The Annotation Panel provides additional options beyond those offered in the pop-out card.
- Adjust the position of the note.
- Lock the note.
- Add URLs
- Link the Note to a Tag or Task
See the Linking Annotations to Tags and URLs guide to learn more.
Tip: You can also create a note from the Markup panel, where you can configure all Note options in one place.
Searching for Notes
Once you've saved your Note, it's easy to locate it again using the Search panel.
- Open the Search Panel.
- Select the Annotations Tab.
- Search by name, description or filter by type or category.
- Click on the Note in the results section to open in the viewer.
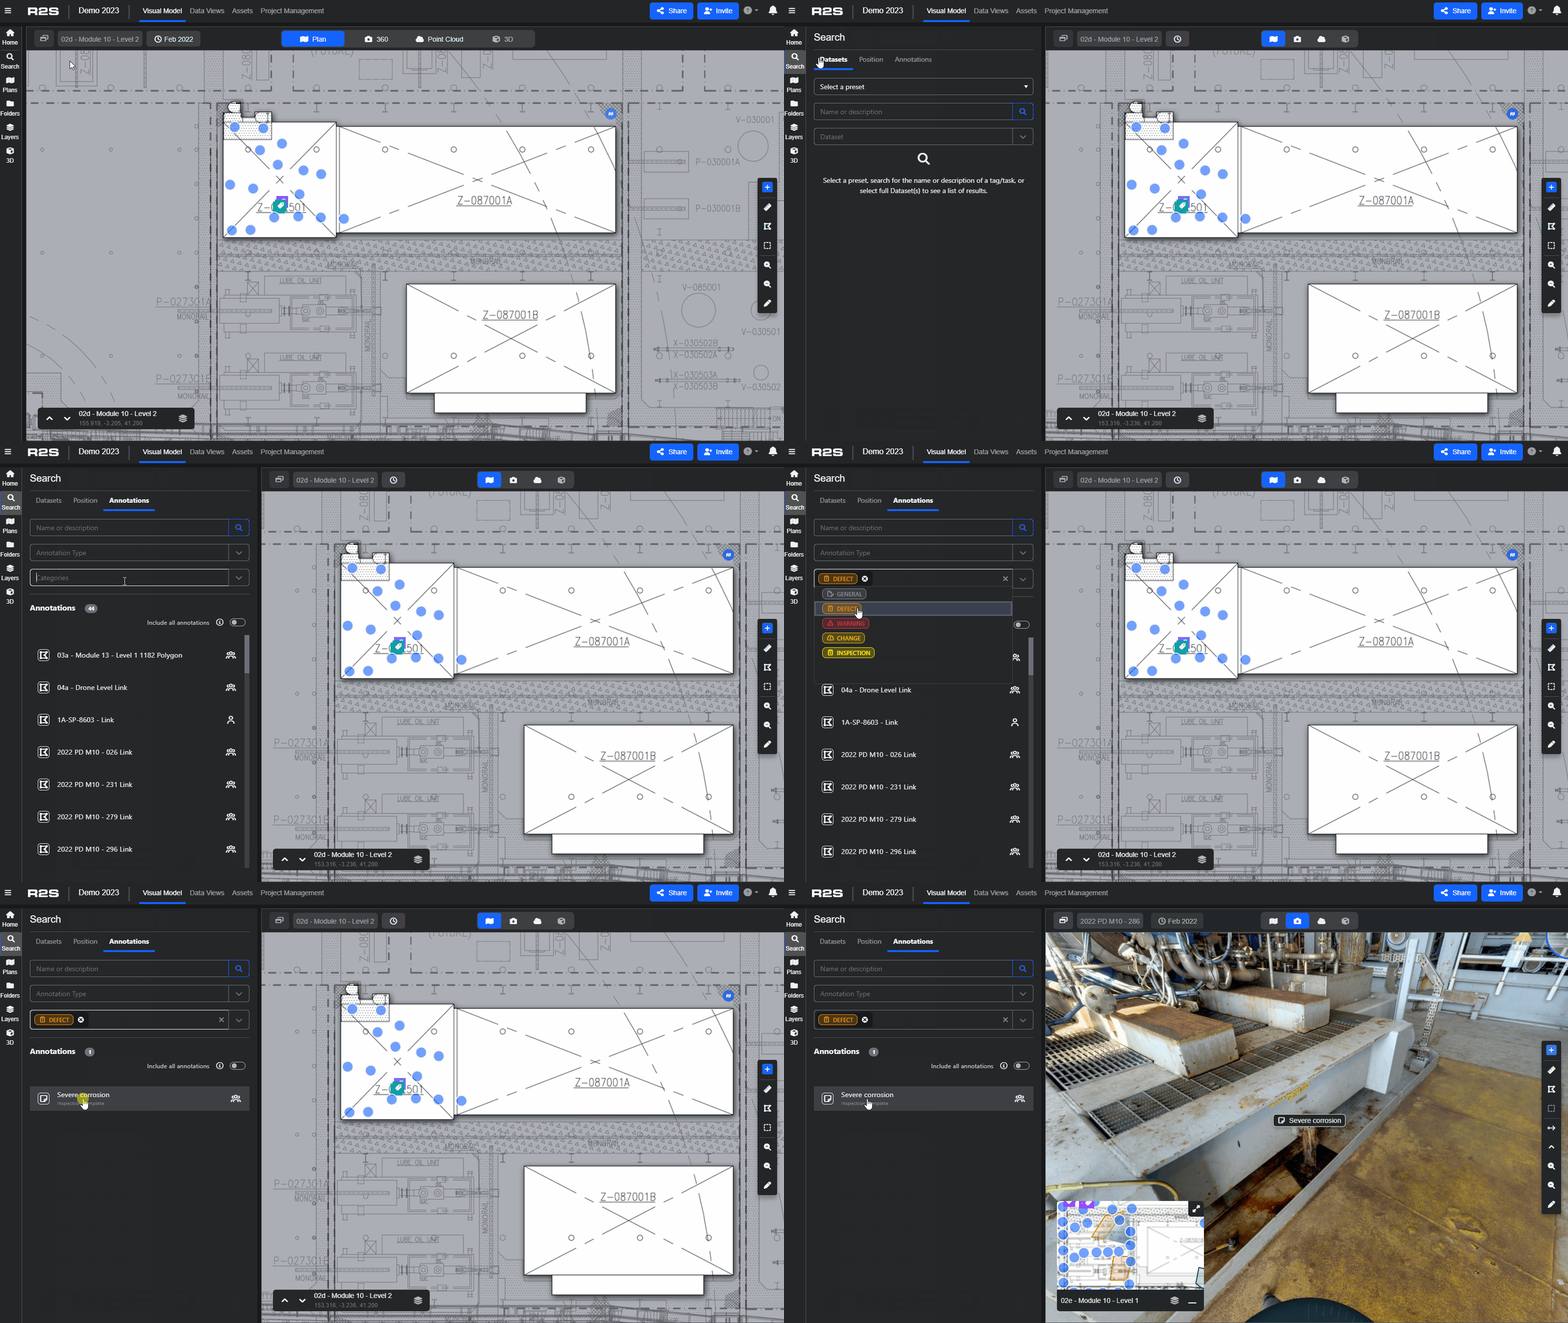
Now that you've learned how to add Notes, have a look at the Markup Tool page to explore other markup types.
Note: If you are having trouble using any tool or feature in R2S please contact our support team here.