Tags & Tasks
Learn about Tags and Tasks and how to create them.

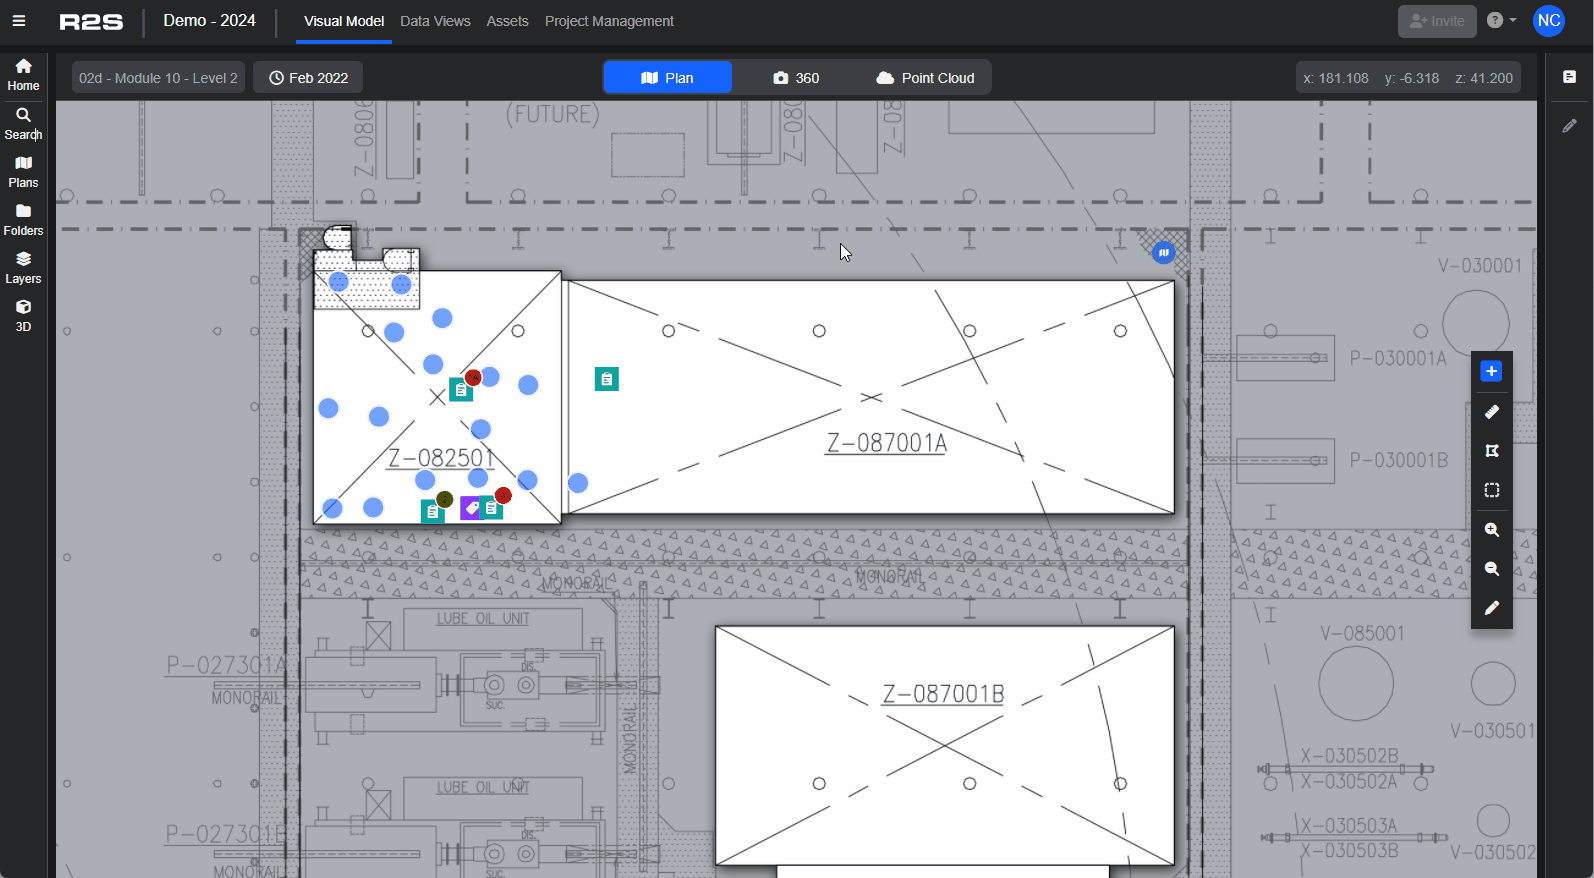
R2S has a flexible hotspot system that lets you add additional layers of information to the visual model. You can place equipment tags, add work orders, inspection points and anomalies directly to plans, images and point clouds using XYZ coordinates. This makes them easy to find and helps you see how everything fits together, giving you unique insights when planning your work.
Tags and Tasks can be added to R2S manually, through an upload performed by AIS or automatically using the R2S API.
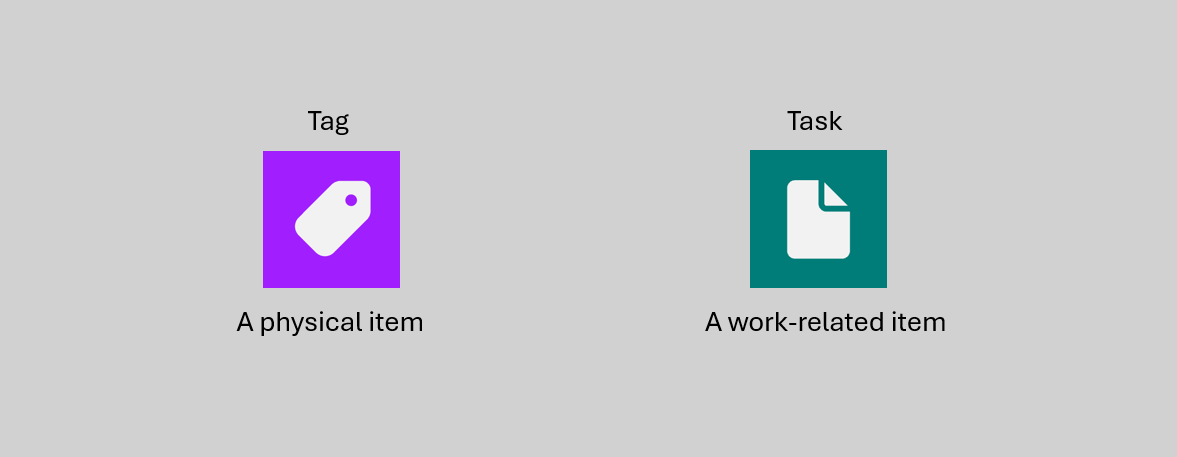
Hotspot Types and Visual Indicators
Hotspots are divided into two distinct categories to help you quickly identify their purpose:
- Tags (purple): Represent physical pieces of equipment.
- Tasks (teal): Refer to work-related activities.
Every tag and task is associated to a Dataset which defines it's
- Type
- Icon
- Metadata
Creating Tags and Tasks
If you have the correct permissions, you can create and place hotspots into the Visual Model. Here's how to do it.
+ button
Located on the Toolbar, this button opens the Create New Item panel.
Follow these steps to create a new hotspot.
- Select a position for the item by either
- Typing a known coordinate into the XYZ boxes or
- Defining an XYZ coordinate for the hotspot. The method varies depending on the type of visual data in use, but follows the same steps as the Point Measurement process.
- Choose the Dataset you want to add the tag/task to
- Enter a name
- Add a description
- Click 'Save'
The tag/task you've created will now be visible in the image, in nearby 360s and on the plan view too.
Try out this interactive guide that walks through an example of adding a new equipment tag.
Once you've created a new tag/task, the Tag Panel opens showing the Metadata tab. You can add further details here as well as adding links and attachments.
Please note: If you don't want to select a position for the new tag/task, click on 'Skip Position' during step 1.
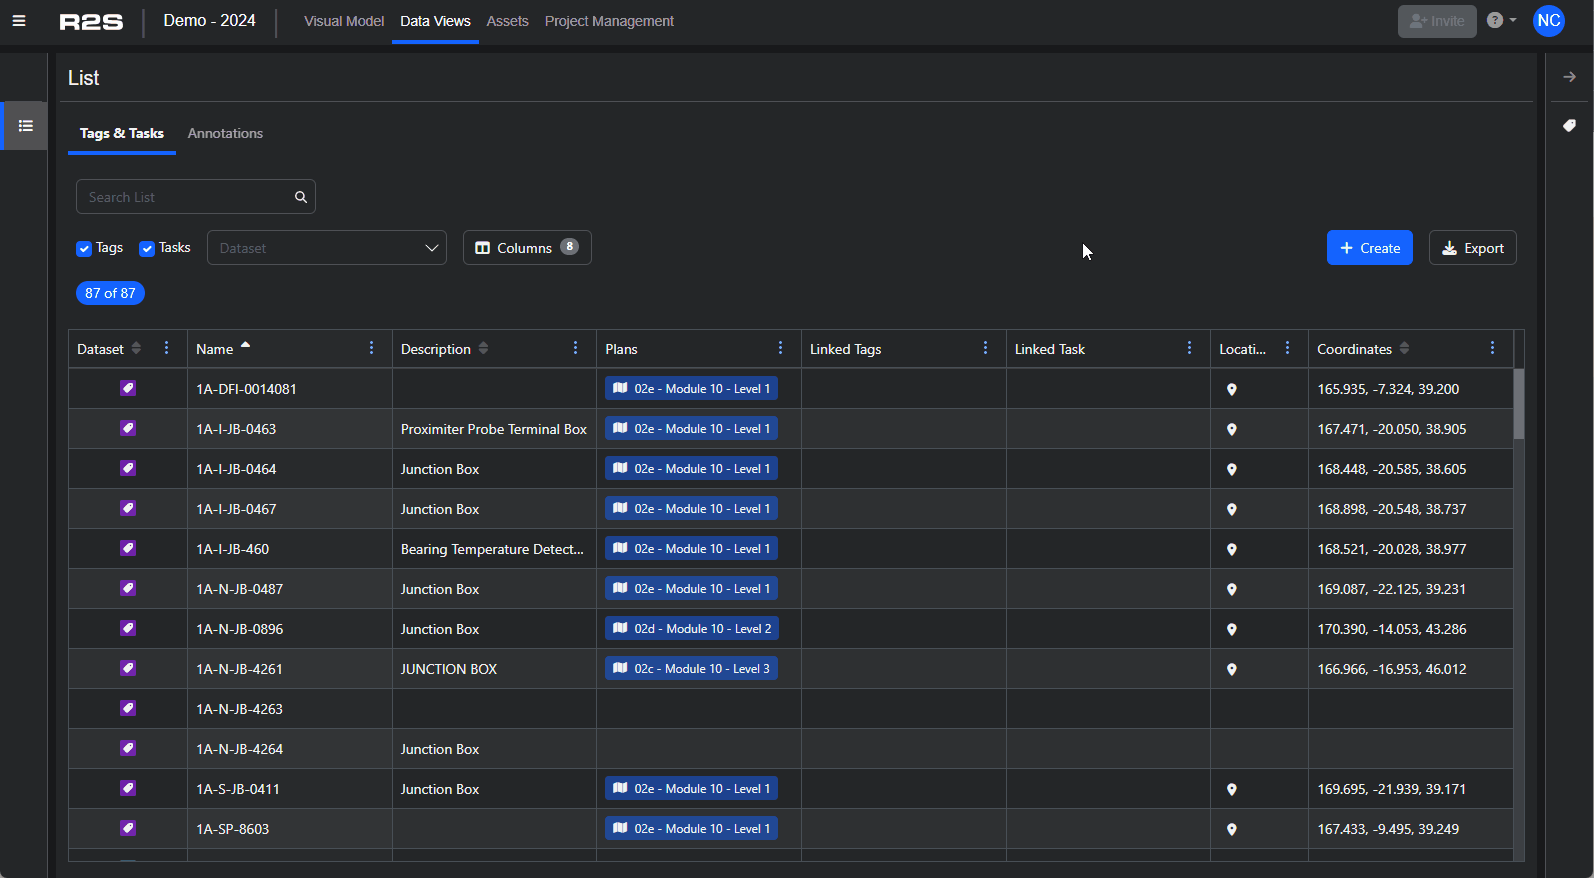
Data Views Page
You can also use the '+Create' button on the Data Views page to add new tags and tasks
- Click "+Create" to open the Create New Item panel
- Select the Dataset you want to add the tag/task to
- Give it a name and description
- If you know where you want to place the tag/task, add in the coordinates (you can do this later)
- Click 'Save'
Once saved, the Tag Panel opens, allowing you to add metadata, links and attachments.
Adding Positions to Existing Tags and Tasks
When creating tags/tasks, you might not always know where they should be located in the visual model. In some instances, a bulk upload of tags or tasks may have been completed with the intention of finding and placing them at a later date.
Follow these steps to position an existing tag/task.
- Navigate to the area you want to place the tag/task.
- Open the tag/task in the Tag Panel (Details Tab).
- Click 'Set Position' and either type in the coordinates or follow the same process as Point Measurement to select a coordinate.
The position of tag/task can also be adjusted using the same process. Click on the 'Set Position' button in the Tag Panel and use the drag handles to move the position or type in a new coordinate if you know it.
Now you've added some tags and tasks, have a look at Tag Panel Overview and Searching to learn other ways to interact with them.
Note: If you are having trouble using any tool or feature in R2S please contact our support team here