Markup Tool
Learn how to create, link, edit and search for markups

R2S allows you to annotate images and plans with markups that add detail and context to the visual model. They're searchable and can be linked to tags and tasks, supporting planning and collaboration with your team. Whether you're adding personal notes, outlining work areas, or creating clear accurate work instructions, markups offer a flexible way to communicate and coordinate effectively.
For 3D markups, please see this guide.
To get started, click the Markup Tool in the Toolbar to open the Markup Panel.

Markup Panel
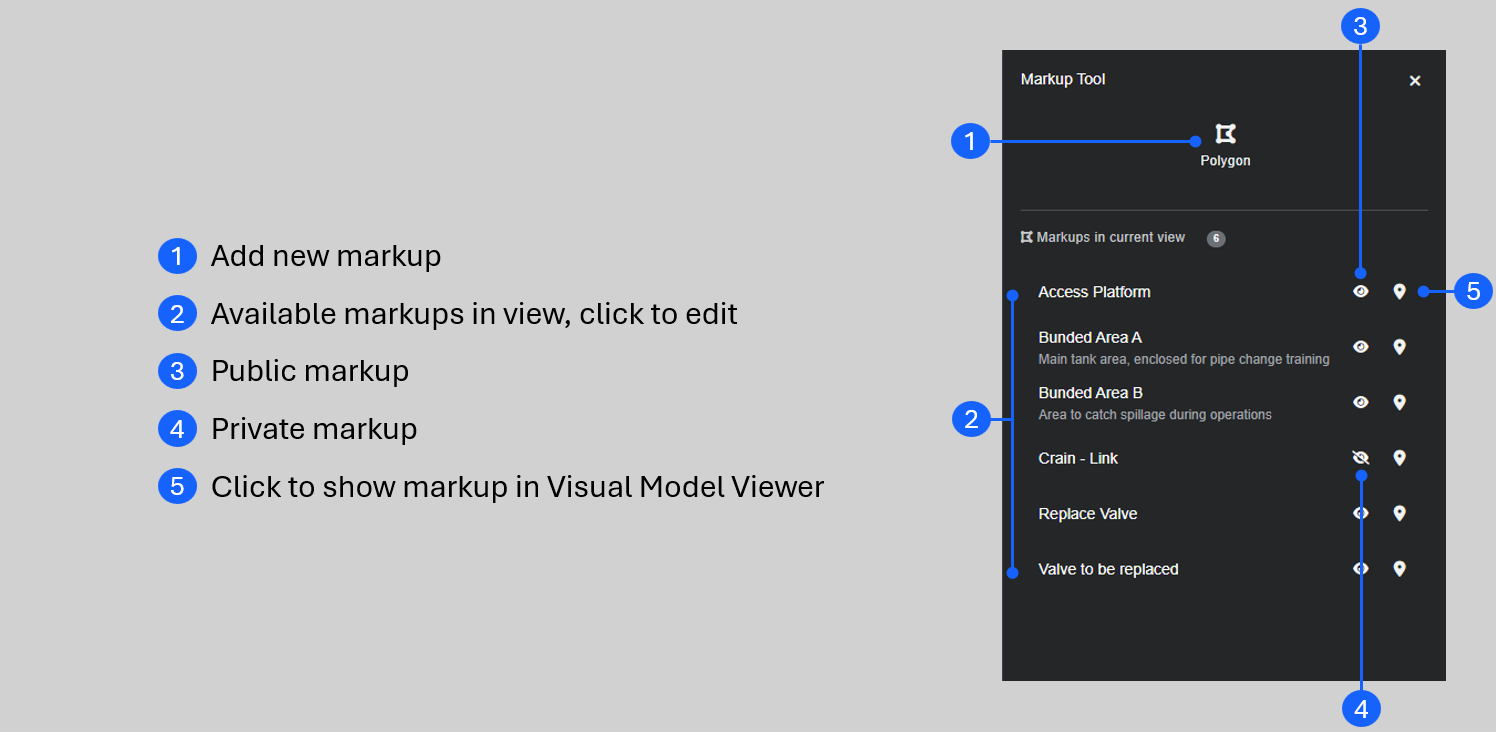
Adding a Markup
- Open the Markup Panel.
- Click the Polygon tool.
- Select 'Pen' or 'Rectangle'.
- Draw your markup.
- Pick the Markup type from the dropdown.
- Note - a simple markup.
- Task link - choose a task to associate with the markup.
- Tag link - choose a tag to associate with the markup.
- Name your markup (this is prepopulated but can be personalised).
- Add a description, if required.
- Choose a colour.
- Change the visibility to 'Public' if you want others to see it.
- Click 'Save'.

Note: If you choose to make your markup 'Public' you can lock it so others can't edit it.
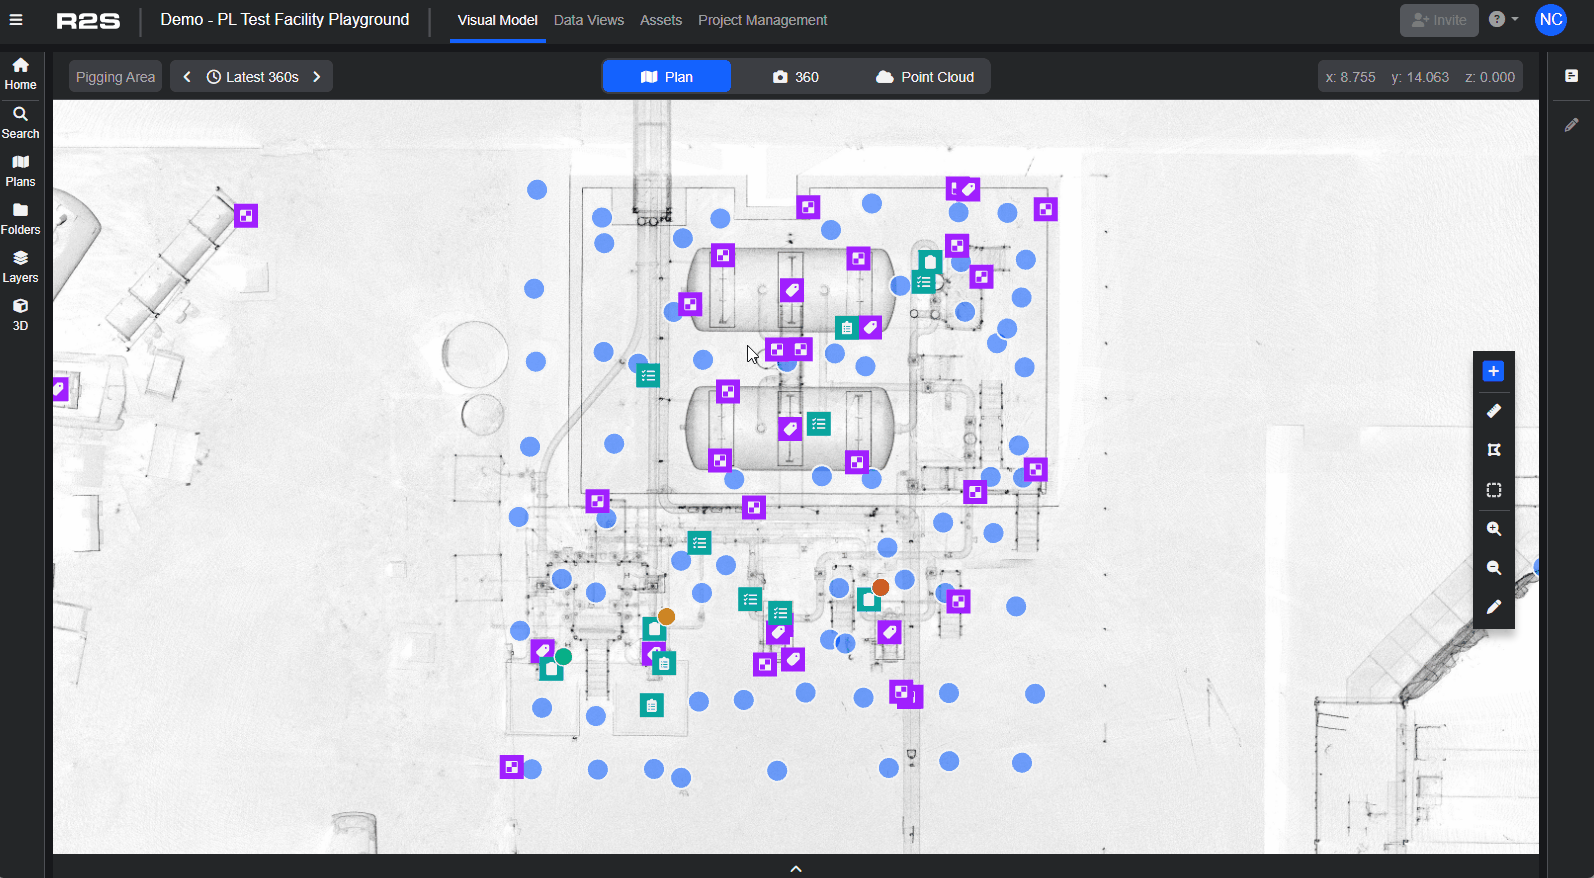
Editing Markups
To go into Edit Mode, right-click on the markup and select 'Edit Markup' or select the markup from the Markup Panel.
You can move the whole markup or drag the points to adjust the shape. Add new points by clicking the halfway point on any line or click on the line to move it. Right-clicking on a point will remove it. You can edit the name, description, links, colour and visibility here too.

Adding a Markup to a Tag or Task
You can link markups to tags (as described earlier) but another option is to add the markup directly to the tag from the Tag Panel.
Follow this interactive guide to learn how.
Searching for a Markup
You can easily find your markups and navigate to them in the Visual Model Viewer.
- Open the Search Panel.
- Select the Annotations Tab.
- Search by name or description or filter by markup type.
Once you've located the markup, click on the marker to open it in the Visual Model Viewer. If you click on the markup text, the Markup Panel will open in Edit Mode.
For more information, see Searching.
Note: If you are having trouble using any tool or feature in R2S please contact our support team here.