3D Model Viewer
Explore the 3D Model viewer in R2S.

Please note: This feature may not be available in your current version of R2S. If you would like to have it added, please get in touch with us here.
The 3D Model Viewer brings 3D models and real-world conditions together in a single, trusted view—transforming how you understand, navigate, and find equipment across complex assets.
Opening the 3D Model Viewer.
To open in a single viewer window, simply press the 3D view mode button. If you're on a plan view, the 3D model will open located at the centre of the plan you're viewing. In 360 or Point Cloud mode, the 3D model will open at the same location and orientation as the previous view.
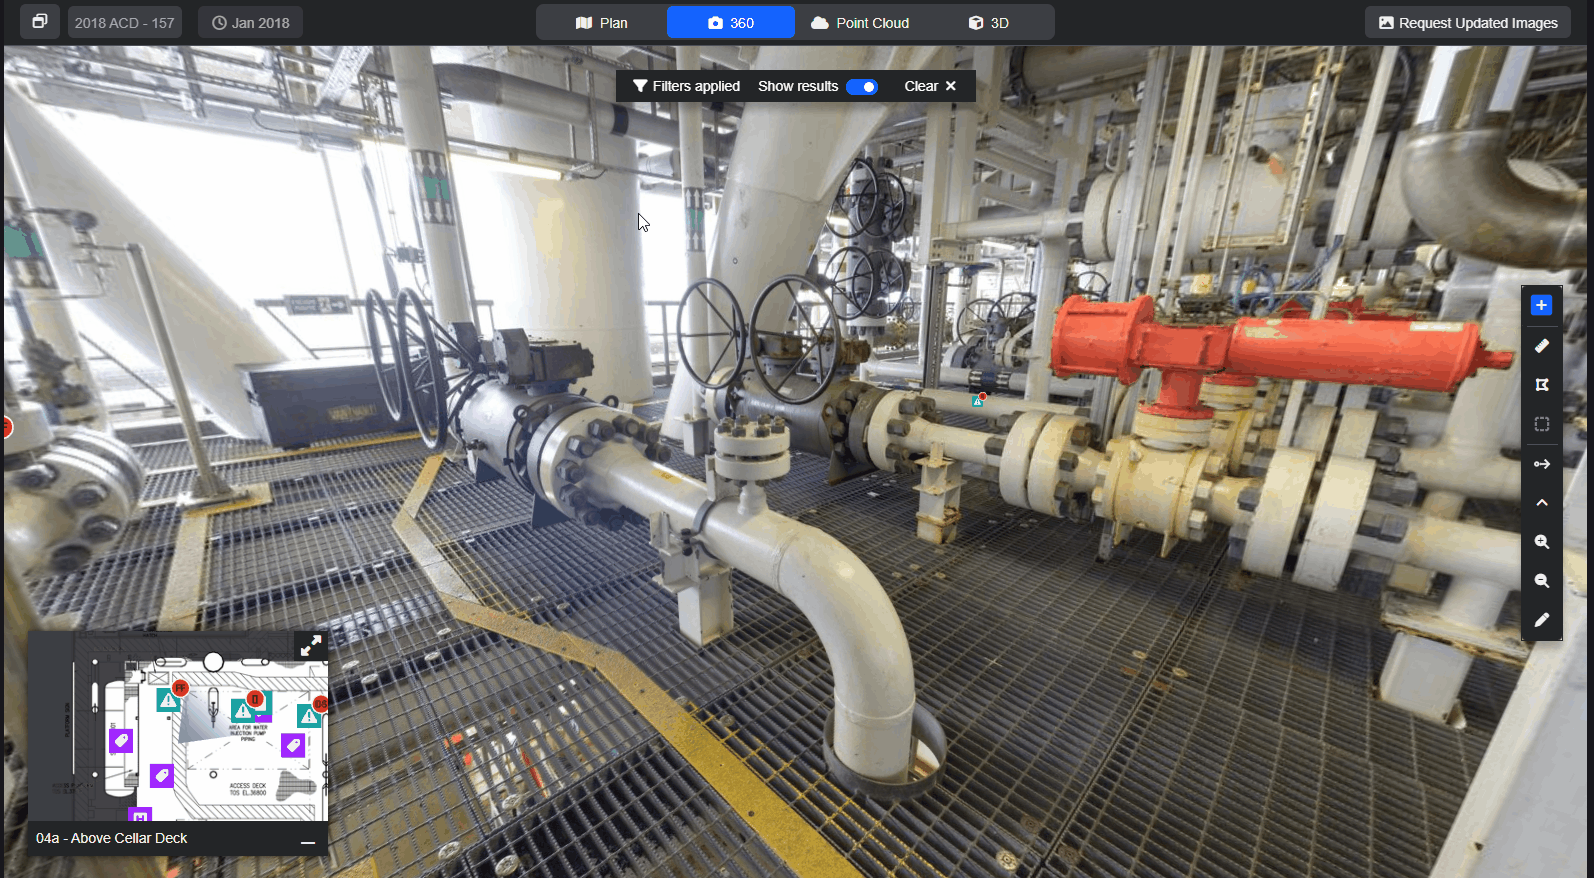
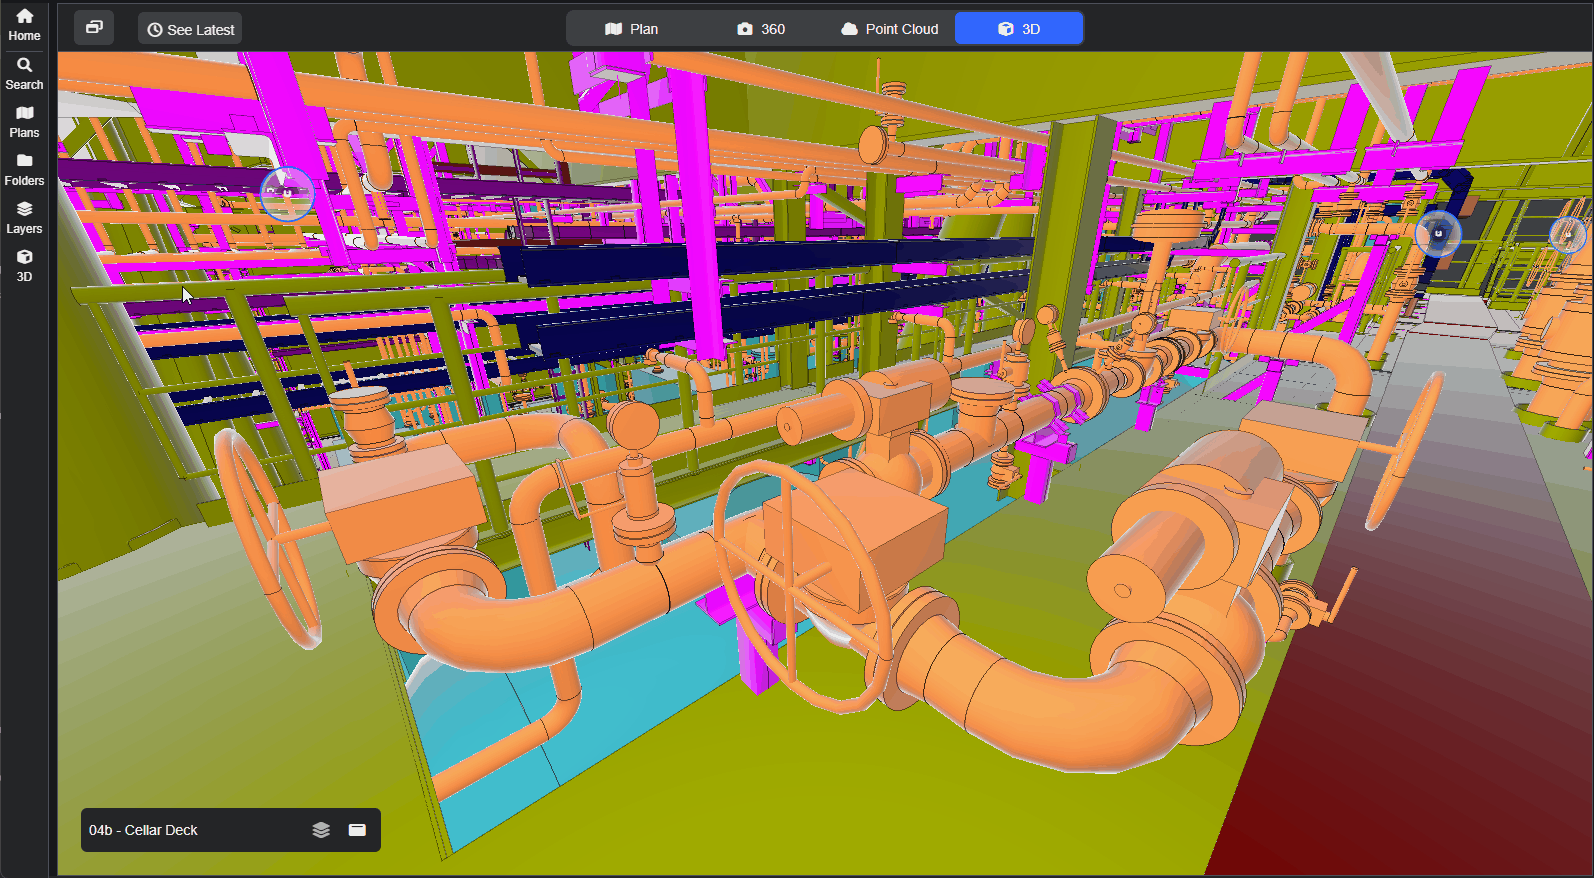
Navigation in 3D Model mode.
There are two main ways to navigate.
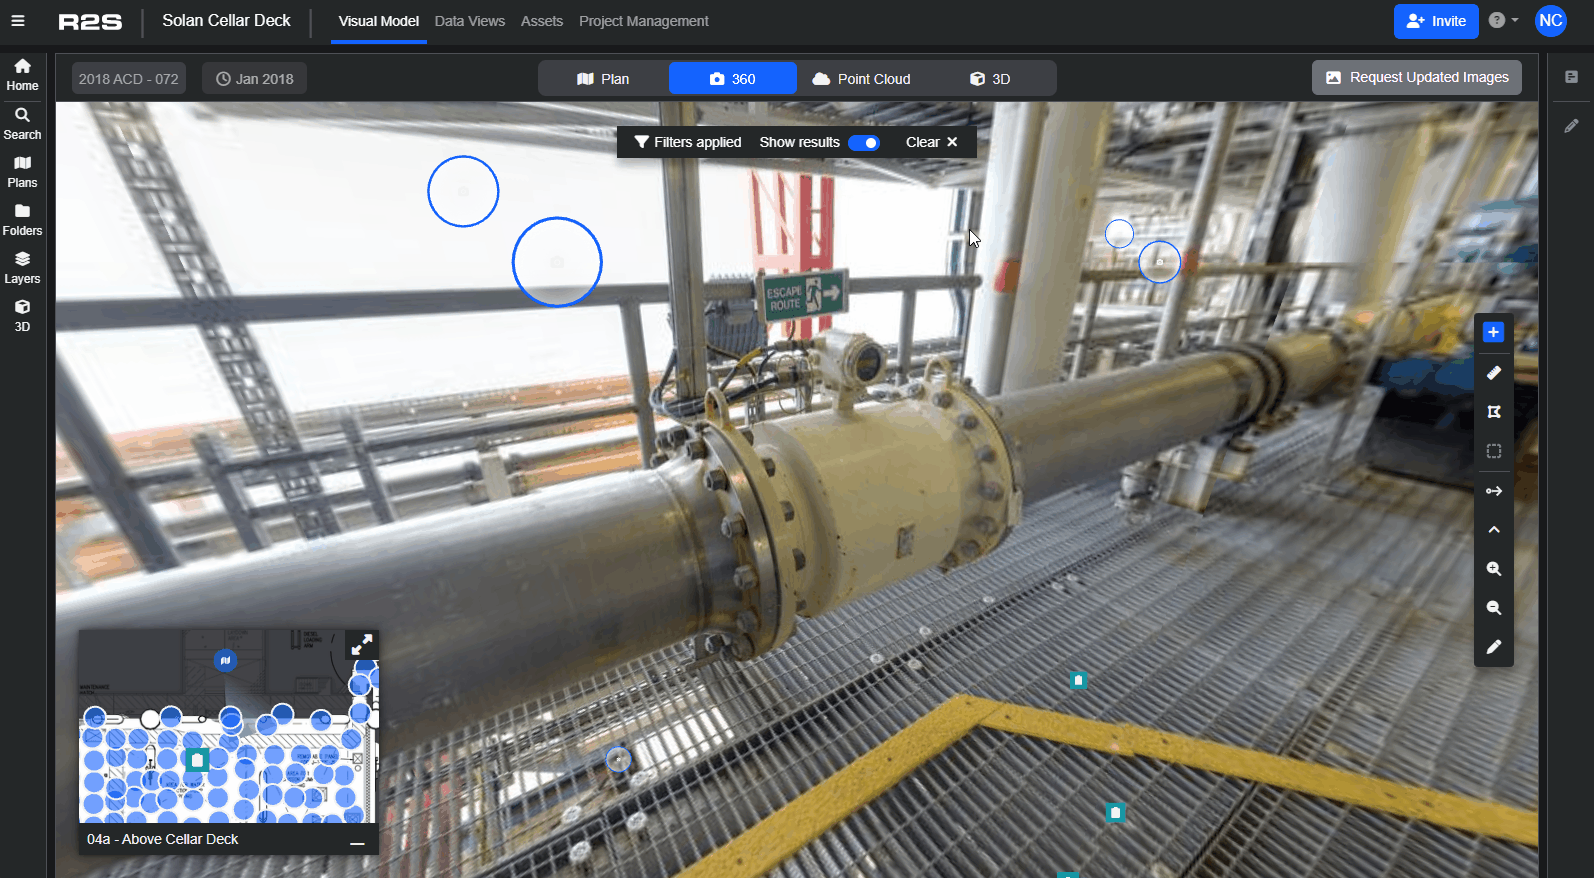
- Point-to-point – simply click on any of the camera icons in the model view to move from location to location
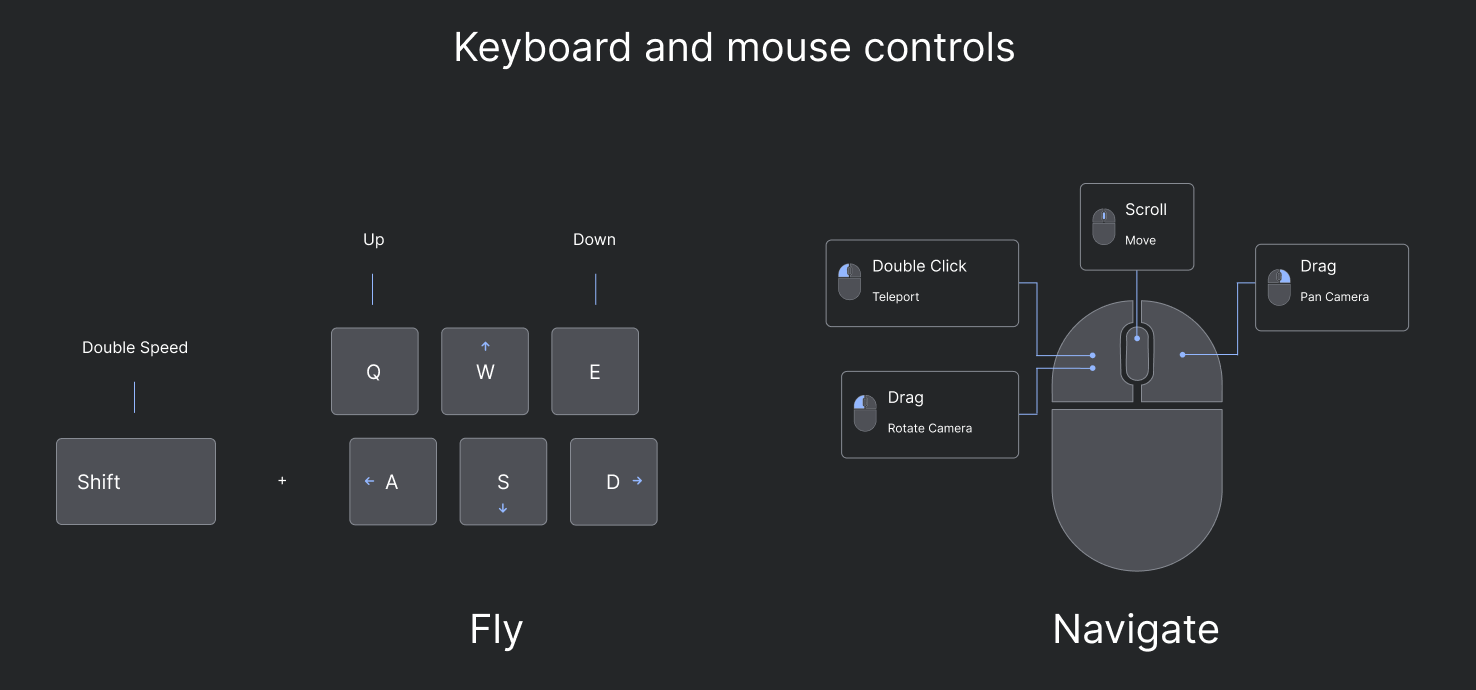
- Free Navigation – move freely throughout the model using either:
Mouse Controls: hold down the left button to look around, right click to pan the view from left to right and use the scroll wheel to move forward.
Keyboard Controls: use WASD keys to move in any direction, use the mouse to adjust your view. The arrow keys can also be used to walk around the 3D model.
When moving around the 3D model, you can change the view mode to 360 or Point Cloud mode at any time. When the mode changes, your view will remain aligned in the same direction, helping you stay oriented as you switch between perspectives.
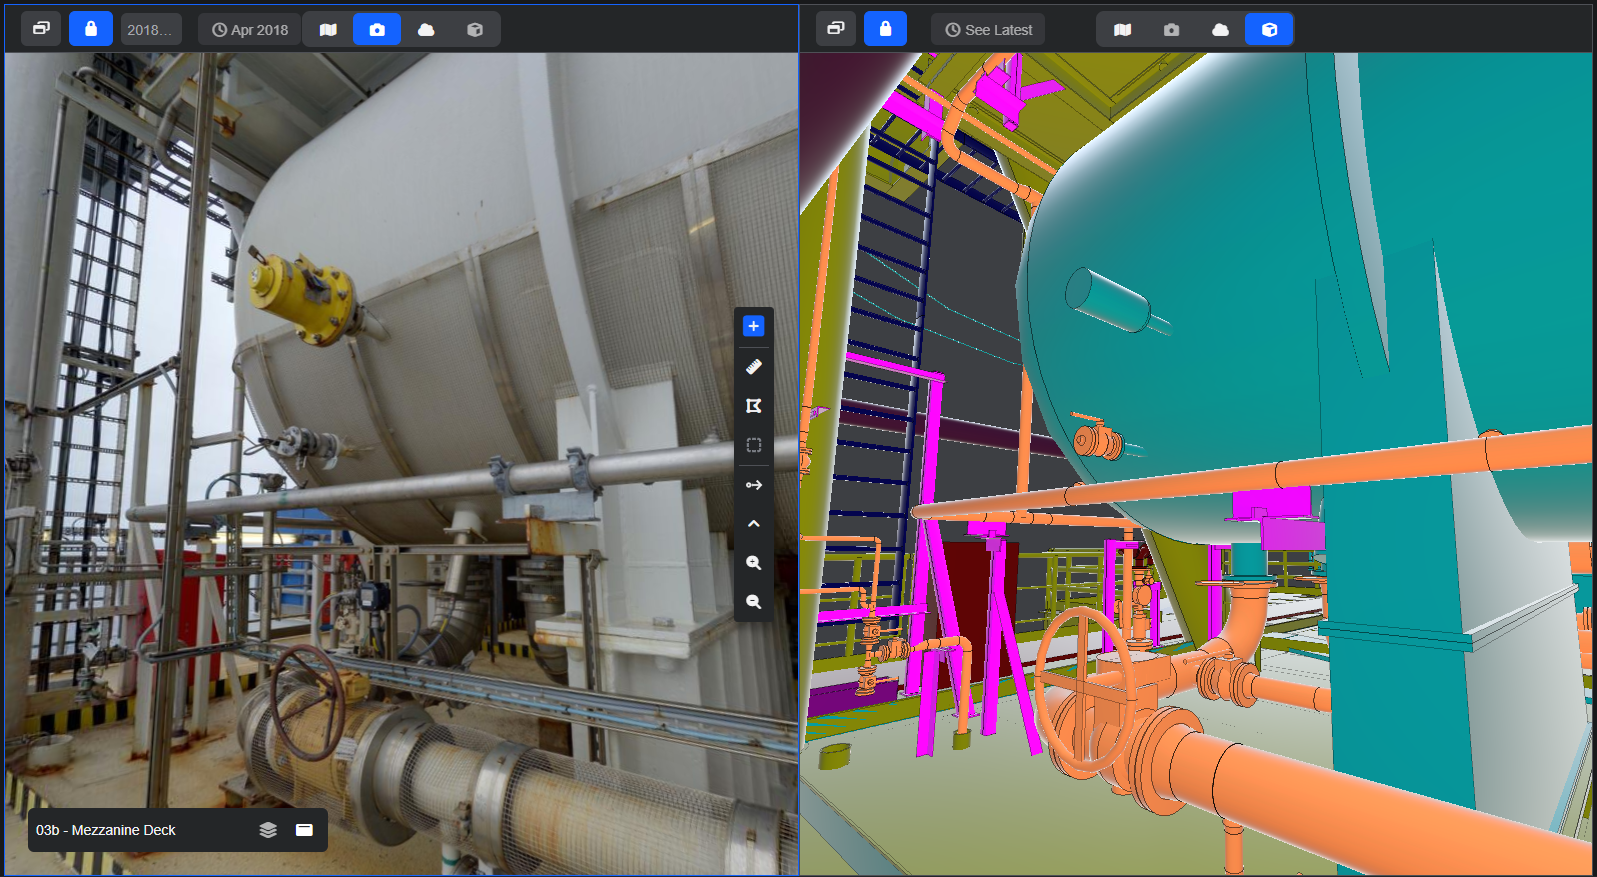
Split Screen Mode.
This mode allows you to see the 3D model side-by-side with either the 360 or point cloud. The two views can be locked together to aid comparisons and verification or unlocked to enable independent navigation in each.
3D Model context menu.
When you select an object in the model, it is highlighted, and a right-click context menu becomes available.
Tip: to select multiple objects in the model, hold down the Shift or CTRL key.
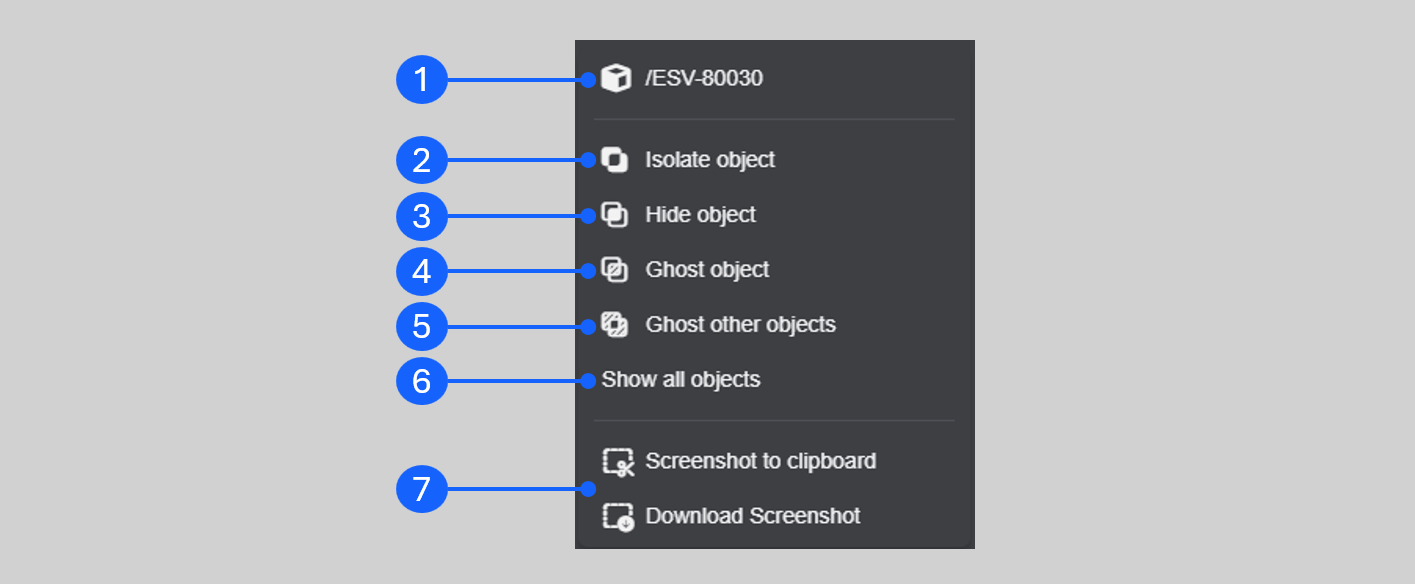
- Object name - click the name to open the 3D model panel with the object highlighted in the hierarchy.
- Hides everything in the model except the selected object(s). The 3D model panel opens with the object(s) highlighted in the hierarchy.
- The selected object(s) are hidden from view.
- Turn the selected object(s) into a wireframe view.
- Isolates the object(s) and turns the rest of the model into a wireframe.
- Turns on all objects in the model, returning to the default view.
- Copy view to file or clipboard.
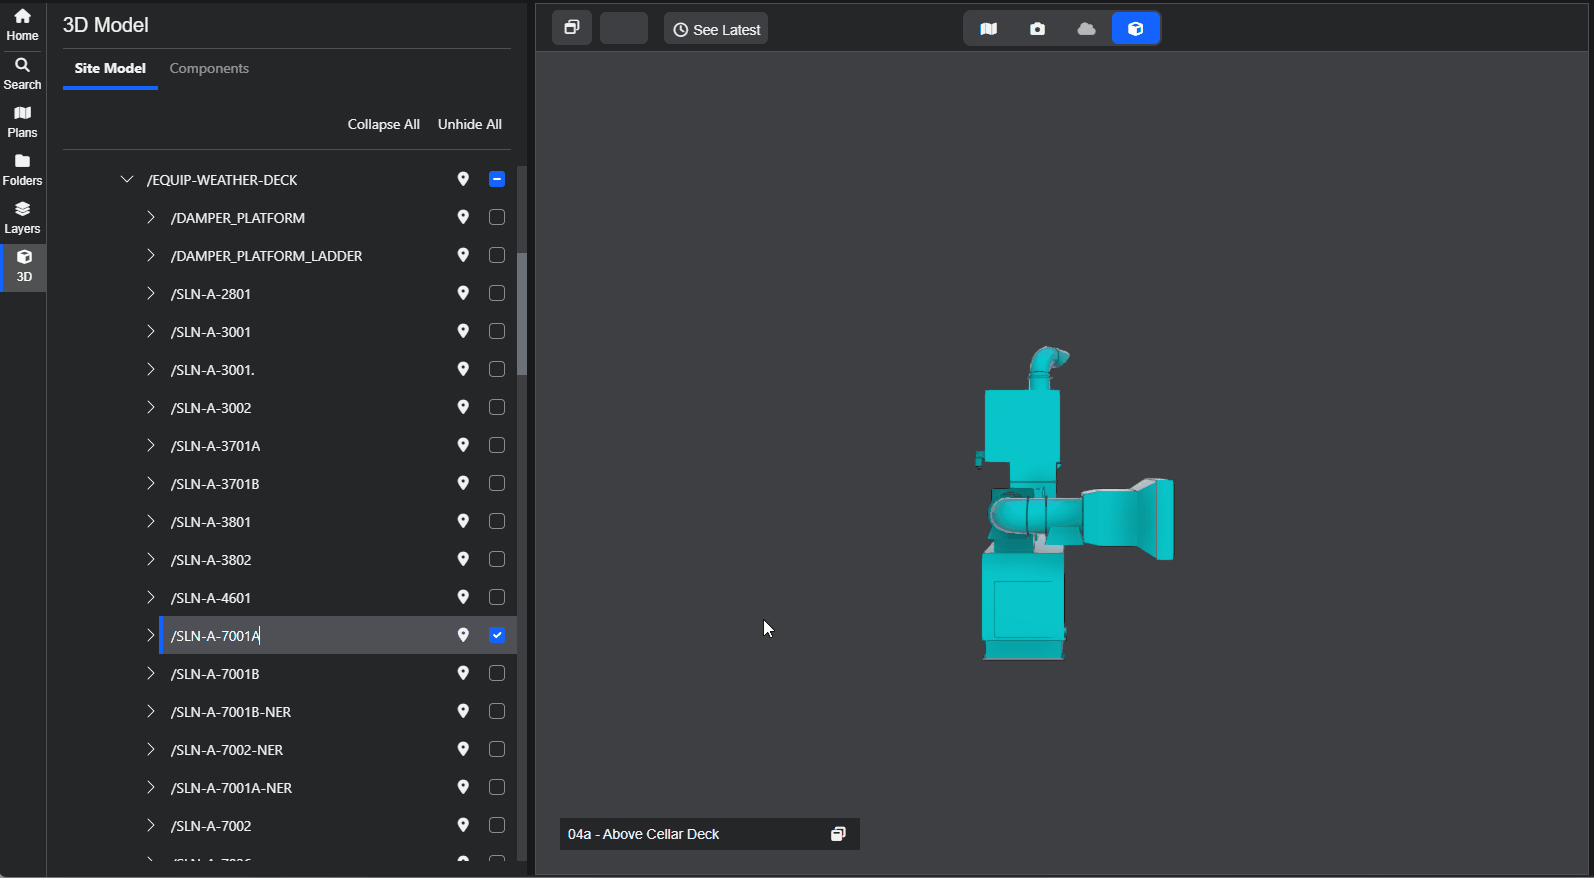
3D Model Panel.
This panel lets you explore the model hierarchy, quickly search for objects, and select elements to isolate or ghost within the model.
- Access the panel from the 3D icon on the Side Panel menu.
- Expand the model hierarchy by clicking on the chevrons.
- Use the checkboxes to toggle model objects on or off.
Searching.
Finding objects in the model is simple.
- Open the 3D Model Panel.
- Type the name of the object in the search box.
- Click on the marker icon to navigate to the object.
To go back to the hierarchy view, simply right-click on the object in the 3D viewer and click the object's name.
Please note: A minimum of three characters is required for searching.
Context Menu in 3D Panel.
To access this menu, first select an object in the heirarchy, then right-click.
- Isolate Object hides everything in the model apart from the selected item.
- Ghost Object turn the selected item into a wireframe, hiding it from view.
- Ghost Other Objects changes everything apart from the selected item into a wireframe.

Tip: to return to the 3D model to it's default view, select 'Unhide All'.
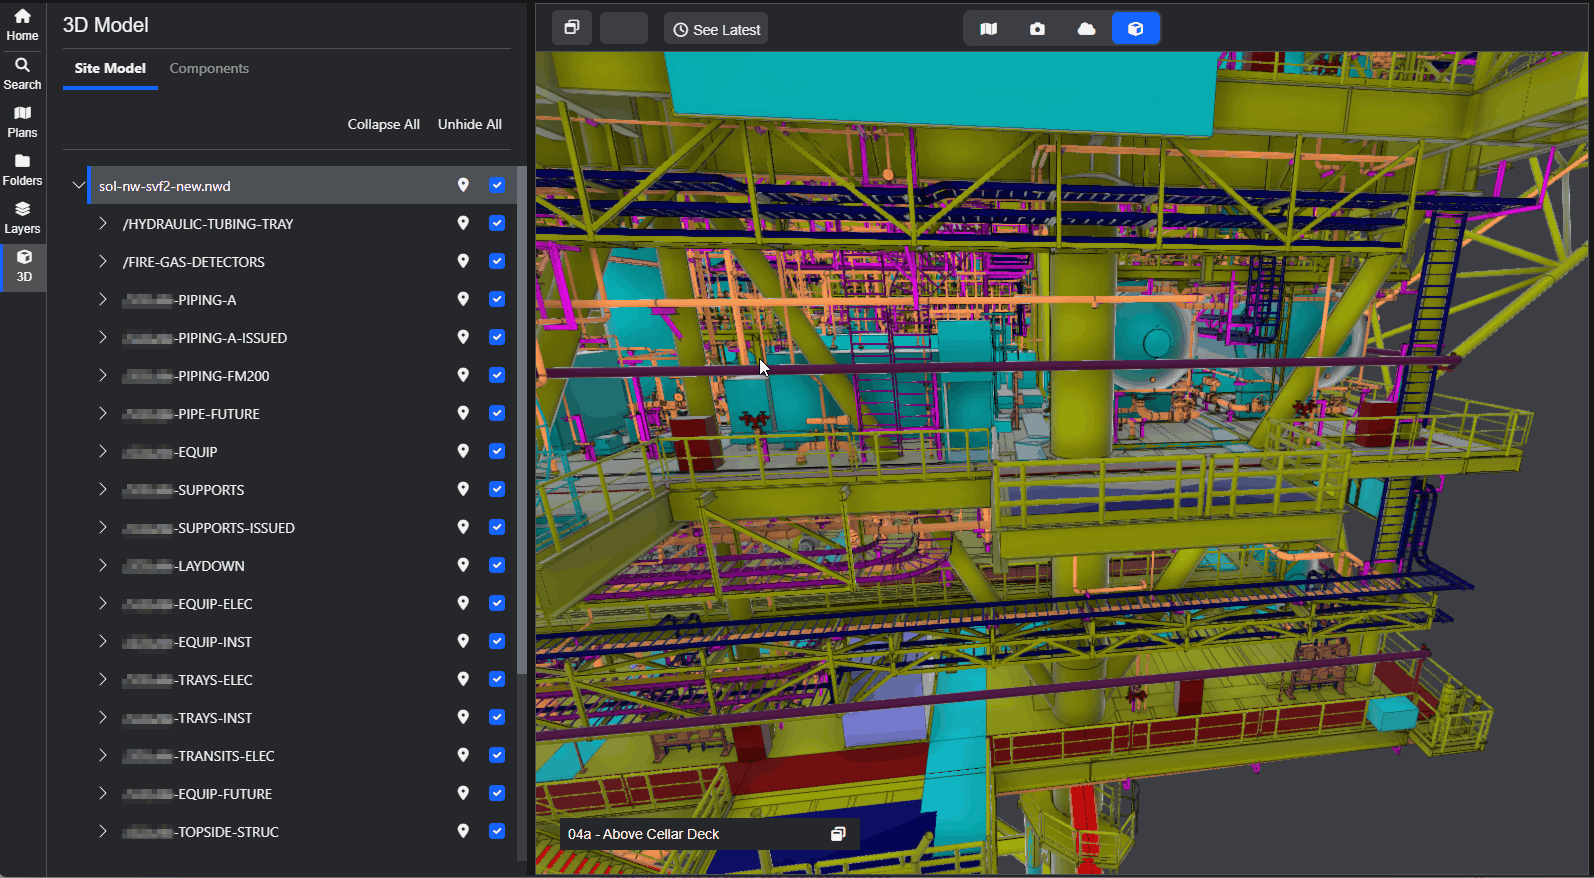
Multiple Selections
You can select multiple items in the the hierarchy by using the CTRL or SHIFT keys
- Hold down the CTRL key and click on individual objects.
- Select an object, hold SHIFT, and select another. All objects in between will be highlighted.
This example shows how to isolate specific classes of information within the model, simplifying the view so you can focus only on what you need to see.
Interactive Training Demonstration.
Step through this interactive demo that brings some of these features together with Split Screen mode. For the best experience, click the arrows in the top right corner to go into full screen mode.
Why not have a look through our Split Screen guide to learn more?
Note: If you are having trouble using any tool or feature in R2S please contact our support team here.