
Adding Labels
Learn how to place Tags, Tasks, and Notes as image labels when an m360 image or point cloud is not available.

R2S will place Tags and Notes in 3D space whenever suitable data is available. This is the preferred method, as it allows the information to be viewed from different images and displayed on the plan view.
If an m360 image or point cloud is not available, you can still add information by creating a Label on the 360° image. Labels are linked only to the image in which they are created and are not visible from neighbouring images.
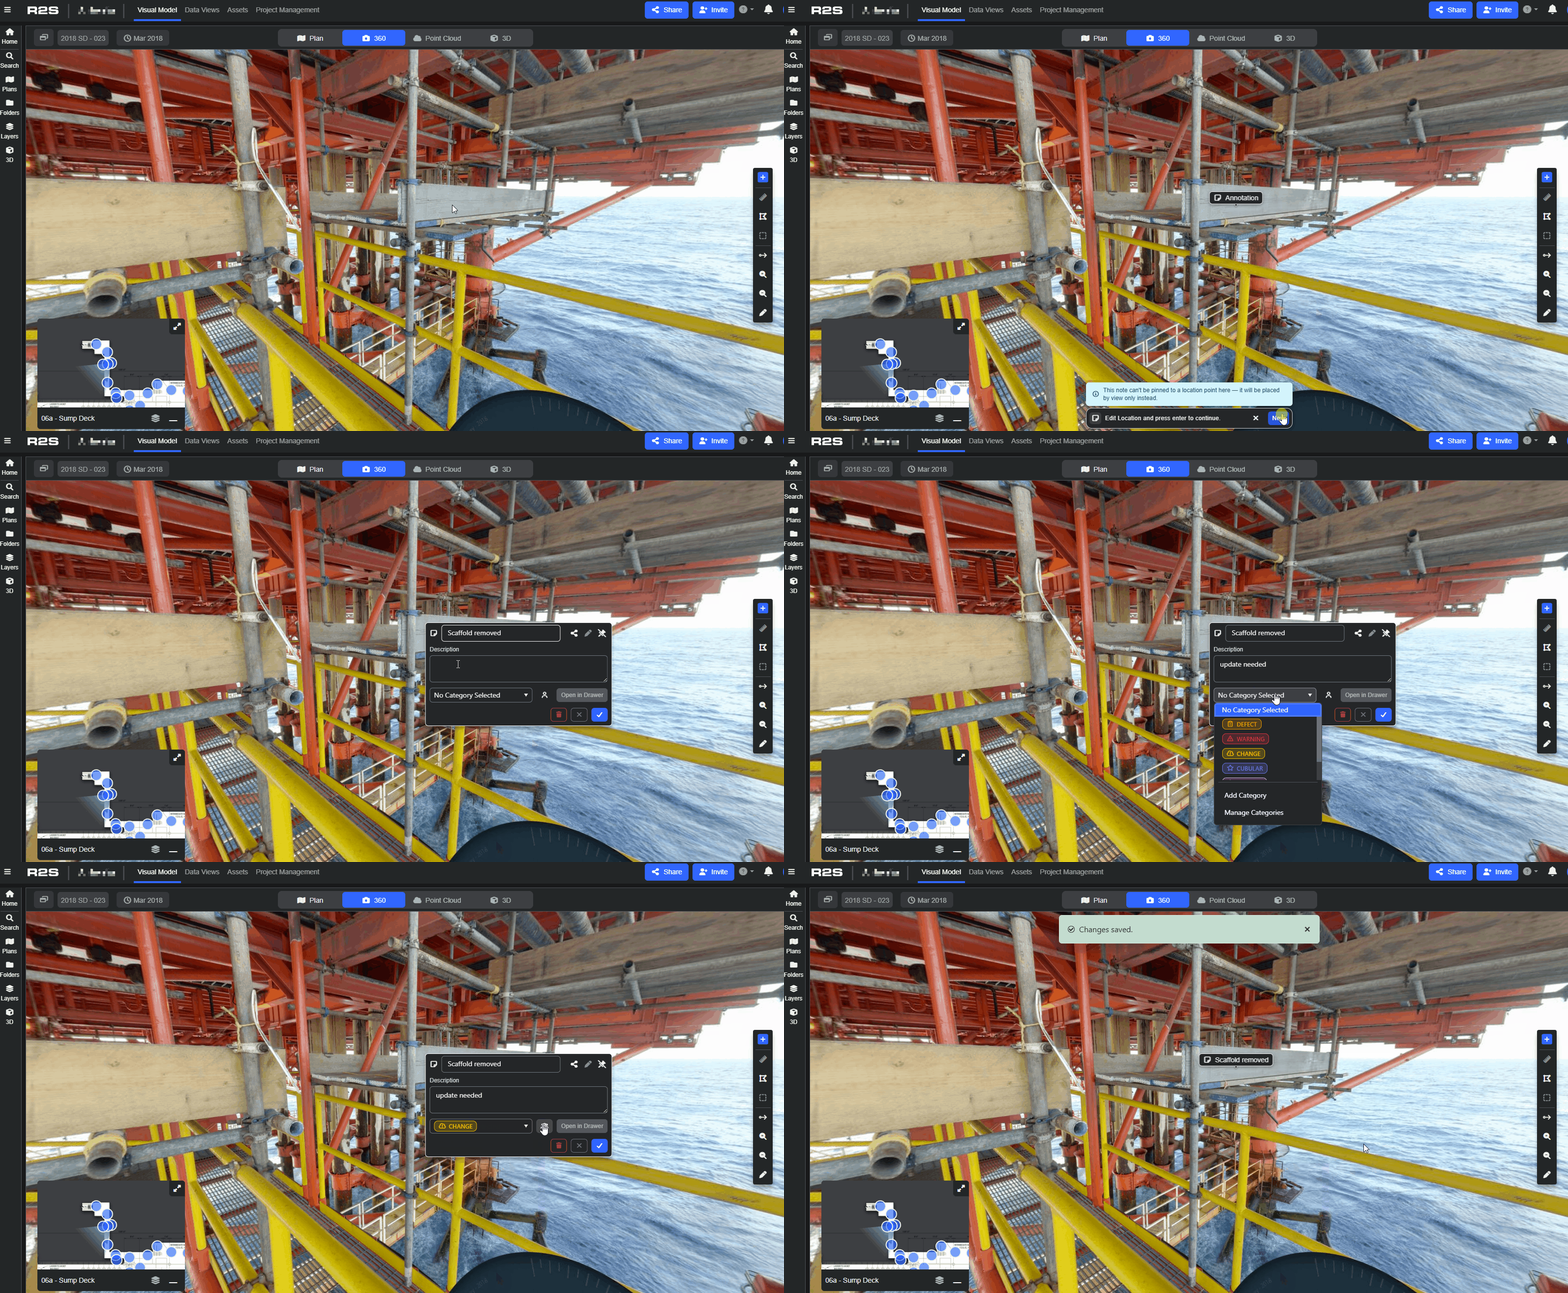
When placing a Note, if you see this message in the viewer, you'll know that a label will be used.

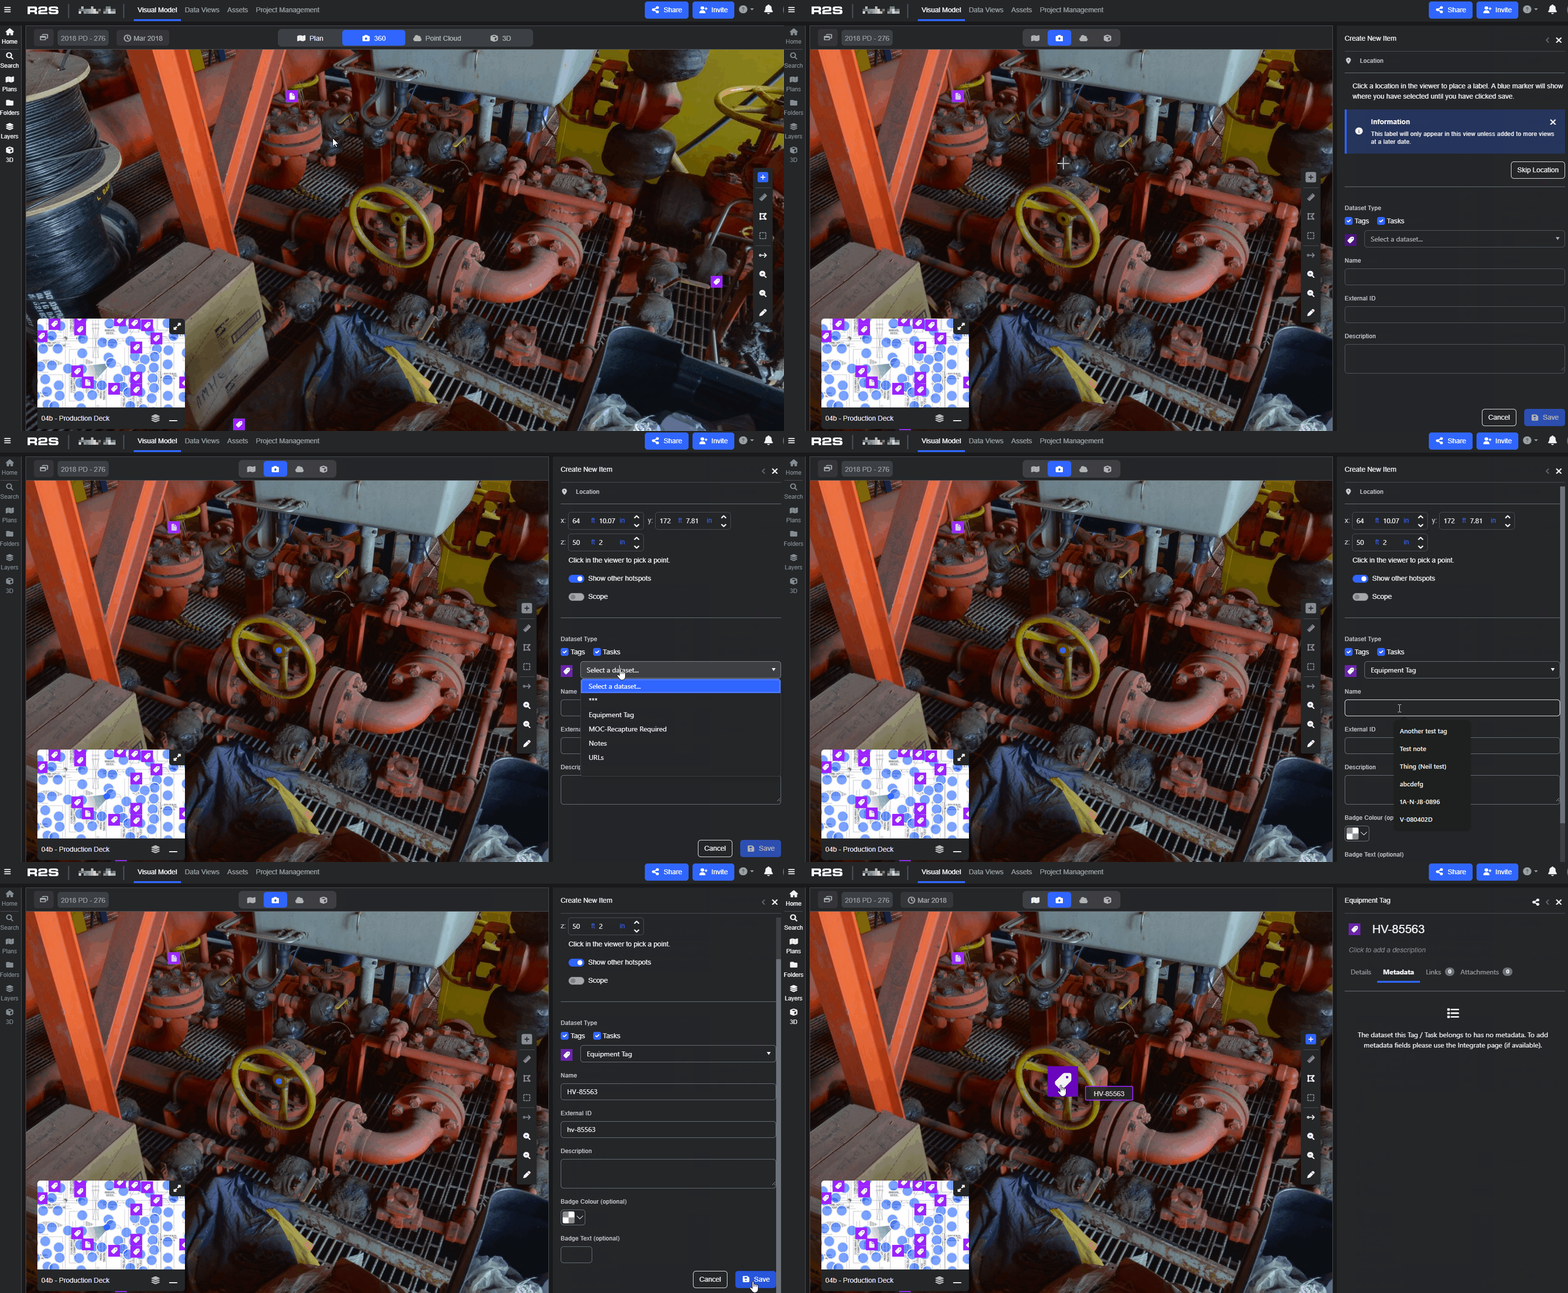
When placing a Tag or Task, if you see this message in the Tag Panel, you'll know a label will be used.

Placing a Note as a Label.
- Right-click in the viewer and select 'Make Note'
- Click Next.
- Complete the pop-out card.
- Save by clicking the tick icon.
Tip: for further information on adding, editing and linking Notes see the see the Notes guide.
Placing a Tag or Task as a Label.
- Click the + icon on the Toolbar.
- Click in the viewer where you want to place the Tag.
- Choose the Dataset that you want to add the Tag or Task to.
- Add a name.
- Click Save.
Tip: for further information, check out the Tags and Tasks guide.
Searching for a Label.
Labels can be searched for and located in the viewer in the same way as coordinate-based Tags and Notes.
- Open the Search Panel.
- If your searching for a Tag use the Dataset tab.
- For Notes, use the Annotations tab.
- Complete the search fields.
Click on the item in the search results to open in the viewer.
Remember: If you're having trouble using any tool or feature in R2S please contact our support team here.