Measurement Overview
Guide to measurement basics

For specific types of measurement, please visit our pages on:
Distance Measurement
Area Measurement
Point Measurement
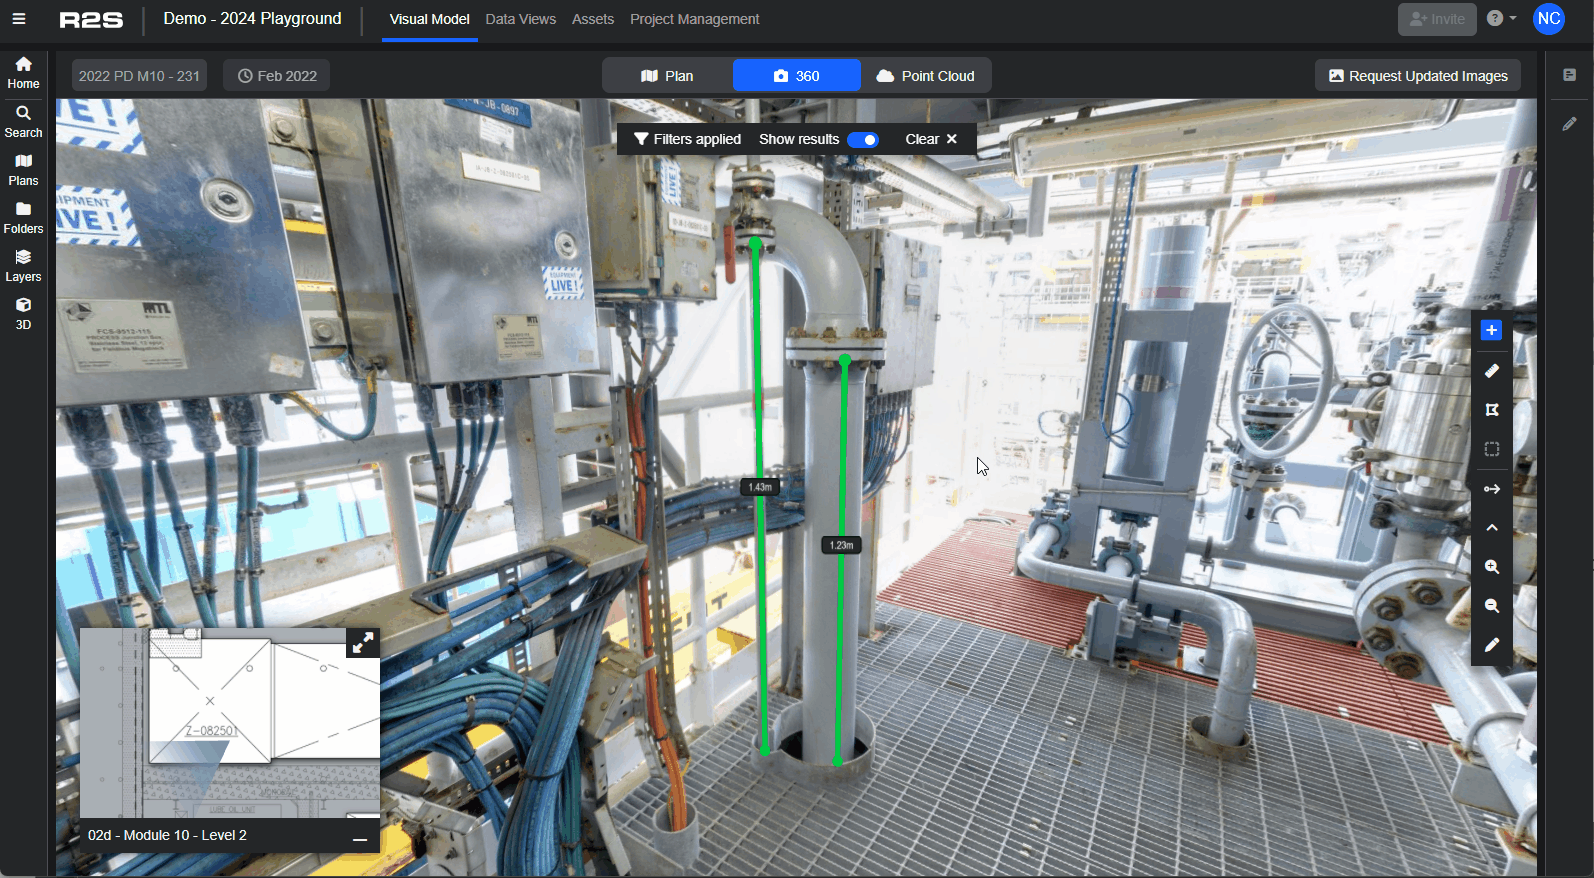
Measurement options are available in 360 images, point clouds and on the plan view, simply click the ruler icon in the toolbar to open the Measurement Panel.
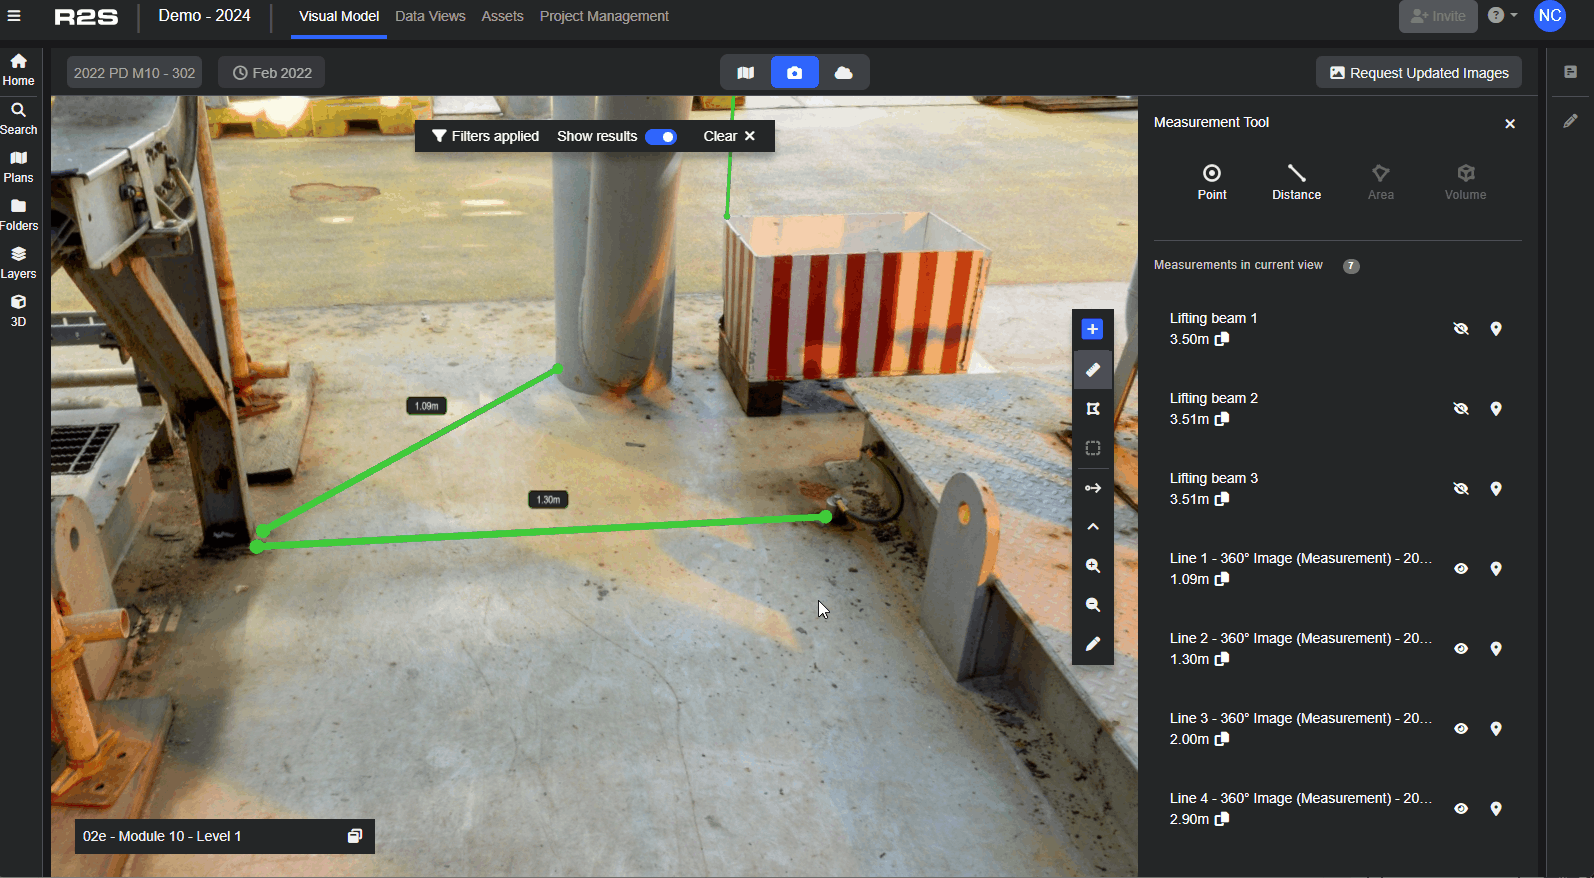
Measurement Panel
This is where you'll find all tools for taking, editing, and reviewing measurements, along with helpful options and tips to guide you through the process. The options vary depending on the View Mode that you are in.
When first opened, the panel displays the following information.
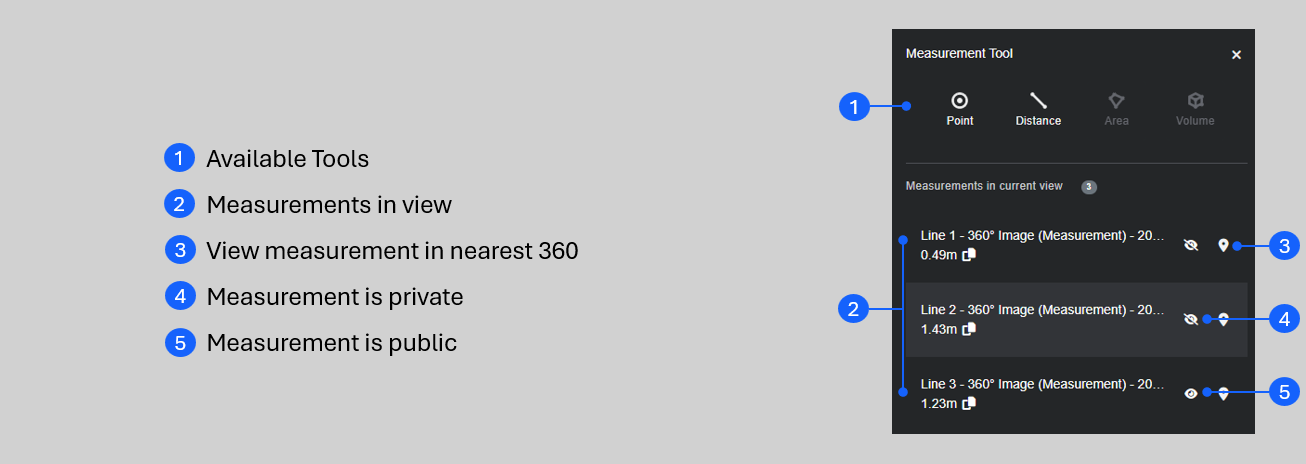
Note: In 360 and Point Cloud Modes, only measurements that are visible within the selected hotspot range filter are shown.
Saving Measurements
Once complete, measurements can be saved for future use and can easily be found again using the Search tools. By default, measurements are saved as ‘Private’, meaning only you can see and search for them. They can also be made ‘Public’ if you want other users to be able to see them too. You can change their visibility at any time. Once 'Public', you also have the option to lock them to prevent others from making edits.

Note: Only the user who generated the measurement can change it back to private once it’s been made public.
Any measurement you take is given an autogenerated name which can be edited to personalise them. Use the description box to explain the measurement—this helps others understand it and makes it easier to locate when using the search tool.
Editing Measurements
Once saved, measurements can be edited by selecting them from the list in the measurement panel or by right clicking on the point, line or area and selecting ‘Edit Measurement’ from the pop out menu.
In edit mode, the end points of the measurement become movable. The way they can be adjusted varies based on the type of data used for the original measurement.
- Plan Mode
- Point and Distance - simply grab the end point and drag it to the desired location. Use the drag handles to be more precise by staying on the X or Y axis.
- Area - grab any end point and drag to adjust. You can click on any line and adjust that too. Additional points can be added by clicking the midpoint of any line.
- Point Cloud Enabled 360 - click on a point and freely drag it to the desired location. Alternatively, use the drag handles to adjust the position along the X,Y or Z axis.
- 360 Image Pair - click on a point and use the drag handles to adjust the measurement on the X,Y and Z axis (as shown below).
Searching for Measurements
You can easily find your saved measurements using the Search Panel
- Open the Search Panel
- Select the 'Annotations' tab
- Use the 'Name and Description' box to find a specific measurement
- Alternatively, use the 'Annotation Type' box to filter the results to show the specific type of measurement you are looking for.
- Clicking on the marker icon opens the measurement in the Main Viewer window, if you click on the text you are taken directly into Edit Mode for that measurement.
For guidance on taking specific types of measurements, see the top of this page or have a look at the section on Markups to learn about other types of annotations in R2S.
Note: If you are having trouble using any tool or feature in R2S please contact our support team here.