
Adding 2D Polygon Markups
Learn how to use the rectangle and pen tools to annotate plans and images.

2D Polygon Markups are plan and 360 image specific. They can only be viewed where they were created and are not shown in other images or plans.
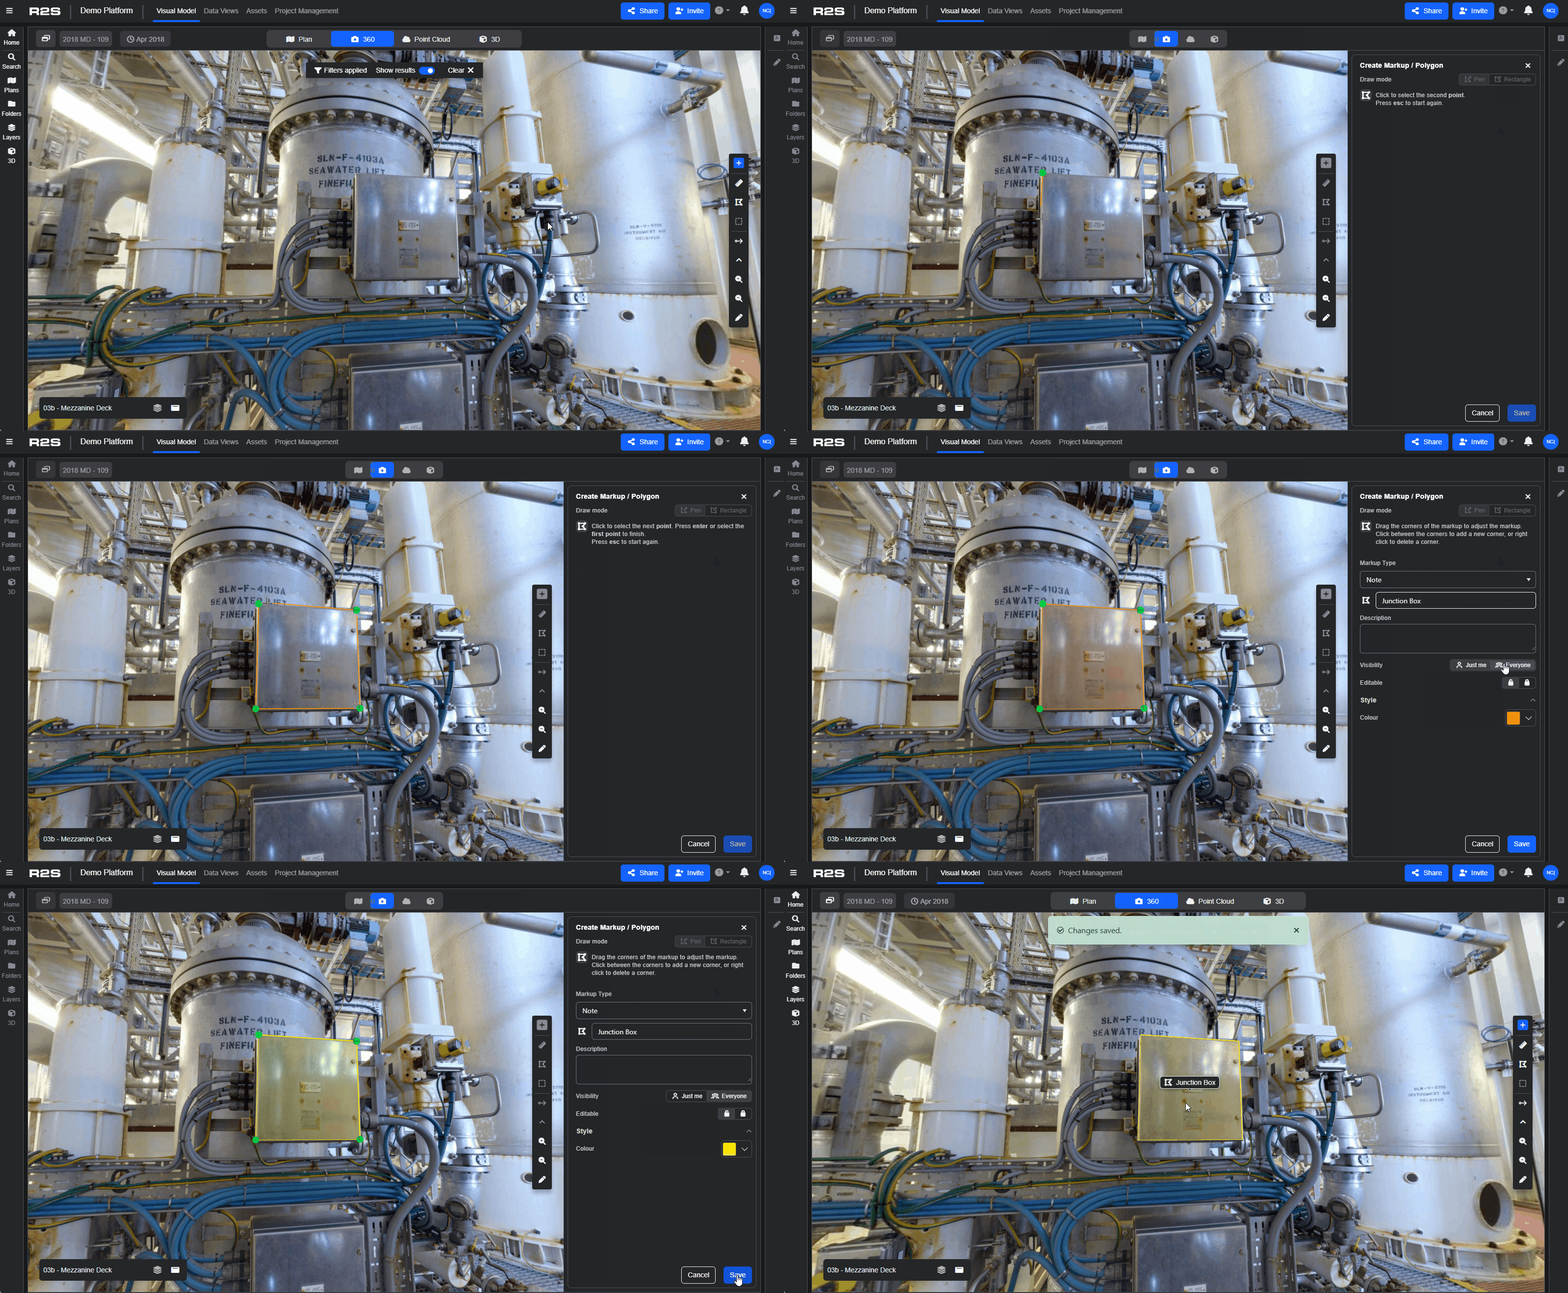
Adding a 2D Polygon.
- Open the Markup Panel.
- Select the Polygon tool.
- Choose a draw mode from either Pen or Rectangle.
- Draw the markup (guidance is provided in the Markup panel).
- Name your markup.
- Add a description (optional but recommended).
Once these steps are complete, you can go ahead and Save the markup but there are additional settings.
- Visibility - Select Just me to keep your markup private, or choose Everyone to make it visible to all users.
- Editable - lock the markup so that other users can't change it.
- Style - choose a colour for your markup.
Note: If you change a markup's visibility from Everyone to Just me and you are not the original creator, the markup will no longer be visible to you. It will remain accessible only to the user who created it.
Additional Options
After saving, you'll have access to more features, allowing you to make the markup more interactive by linking it to Tags and Tasks or URLs.
To learn more see Linking Tags and Annotations.
Locating Markups
Once you've saved your 2D polygon markup, it's easy to locate it again using the Search panel (see Searching)
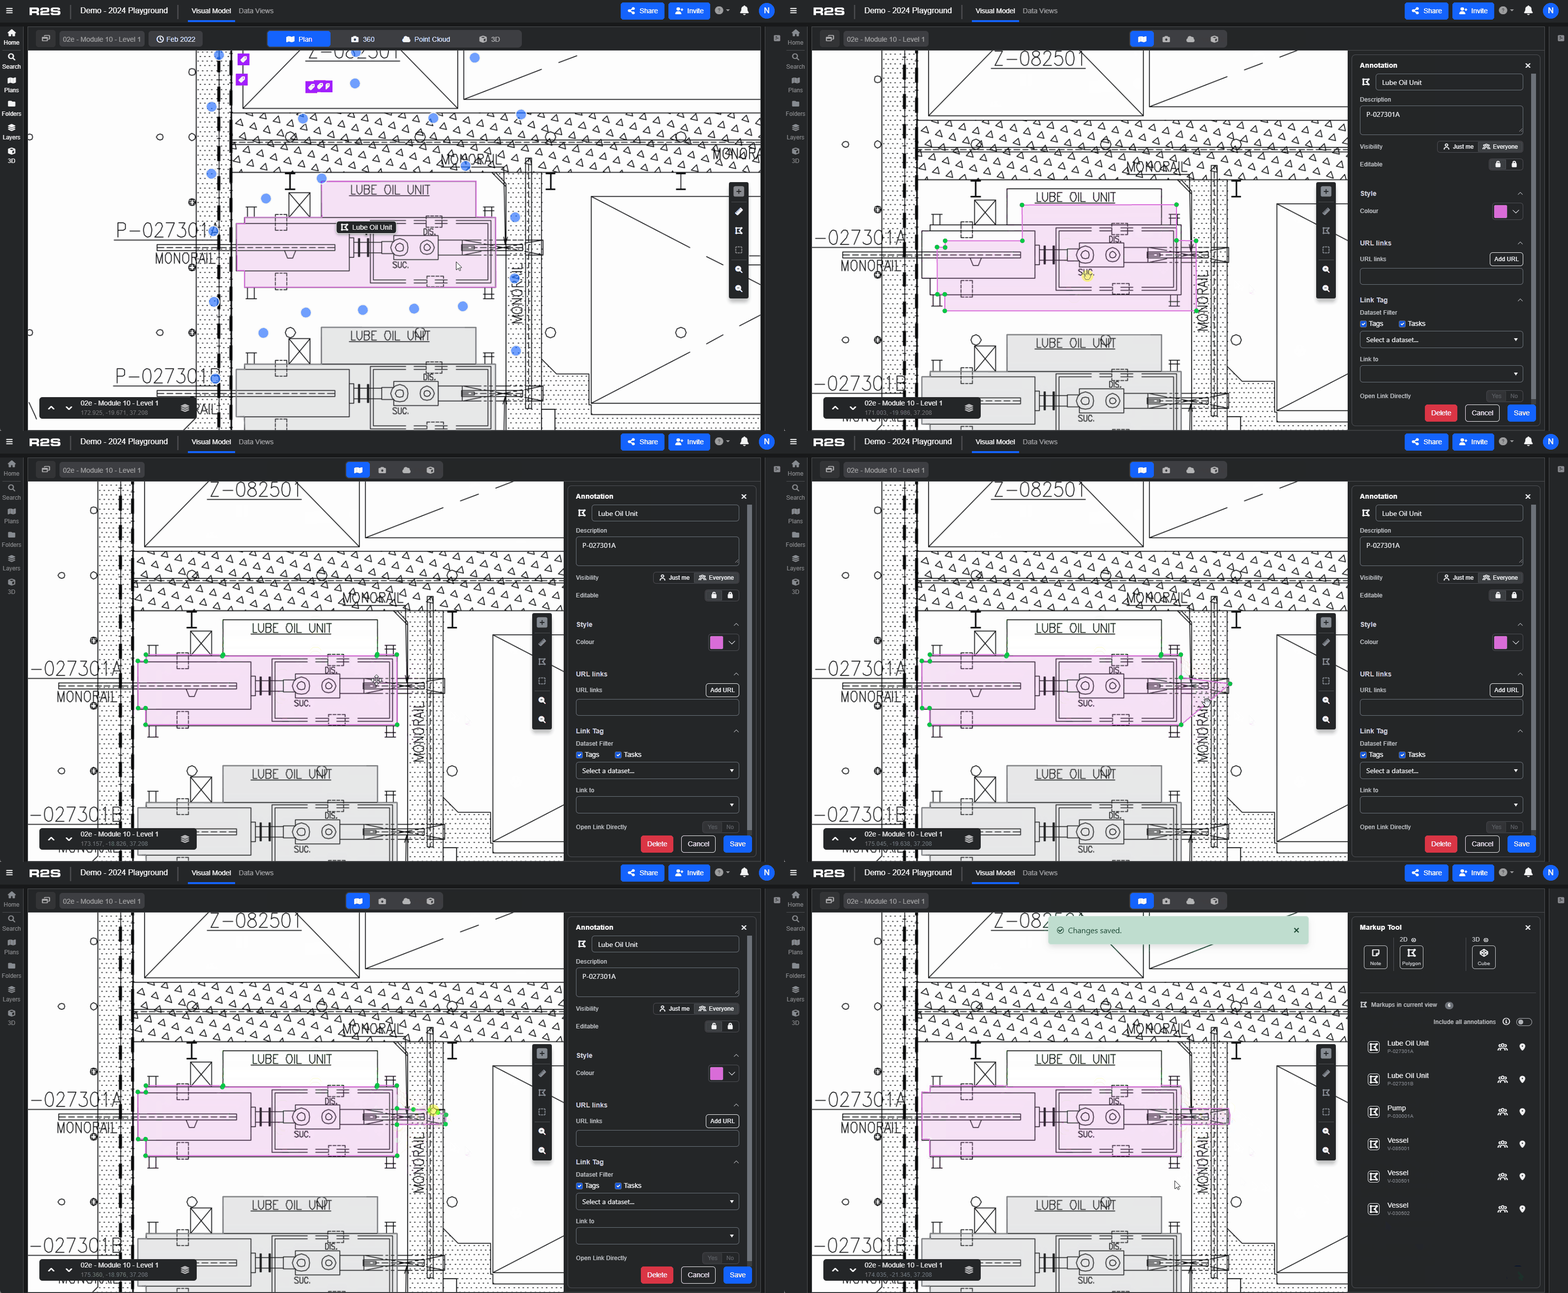
Editing 2D Polygon Markups
You can switch to edit mode from multiple places.
- For quick edits, click the label at the centre of the markup and click on the pen icon.
- Select the markup from the Markup Panel.
- Click the on the label at the centre of the markup and click on the pen icon.
When in edit mode, you can move the whole markup or drag the points to adjust the shape. Add new points by clicking the halfway point on any line or click on the line to move it. Right-clicking on a point will remove it. You can edit the name, description, links, colour and visibility here too.
Now that you've learned about 2D Polygons, have a look at the Markup Tool page to explore other markup types.
Note: If you are having trouble using any tool or feature in R2S please contact our support team here.