Filter Panel
Learn how to refine your search results using filters

The Filter Panel helps you narrow down search results, allowing you to focus on exactly what you’re looking for. Using Filters, you can create tailored views of your tag or task data (see Tags and Tasks) that can be saved and shared with other users.
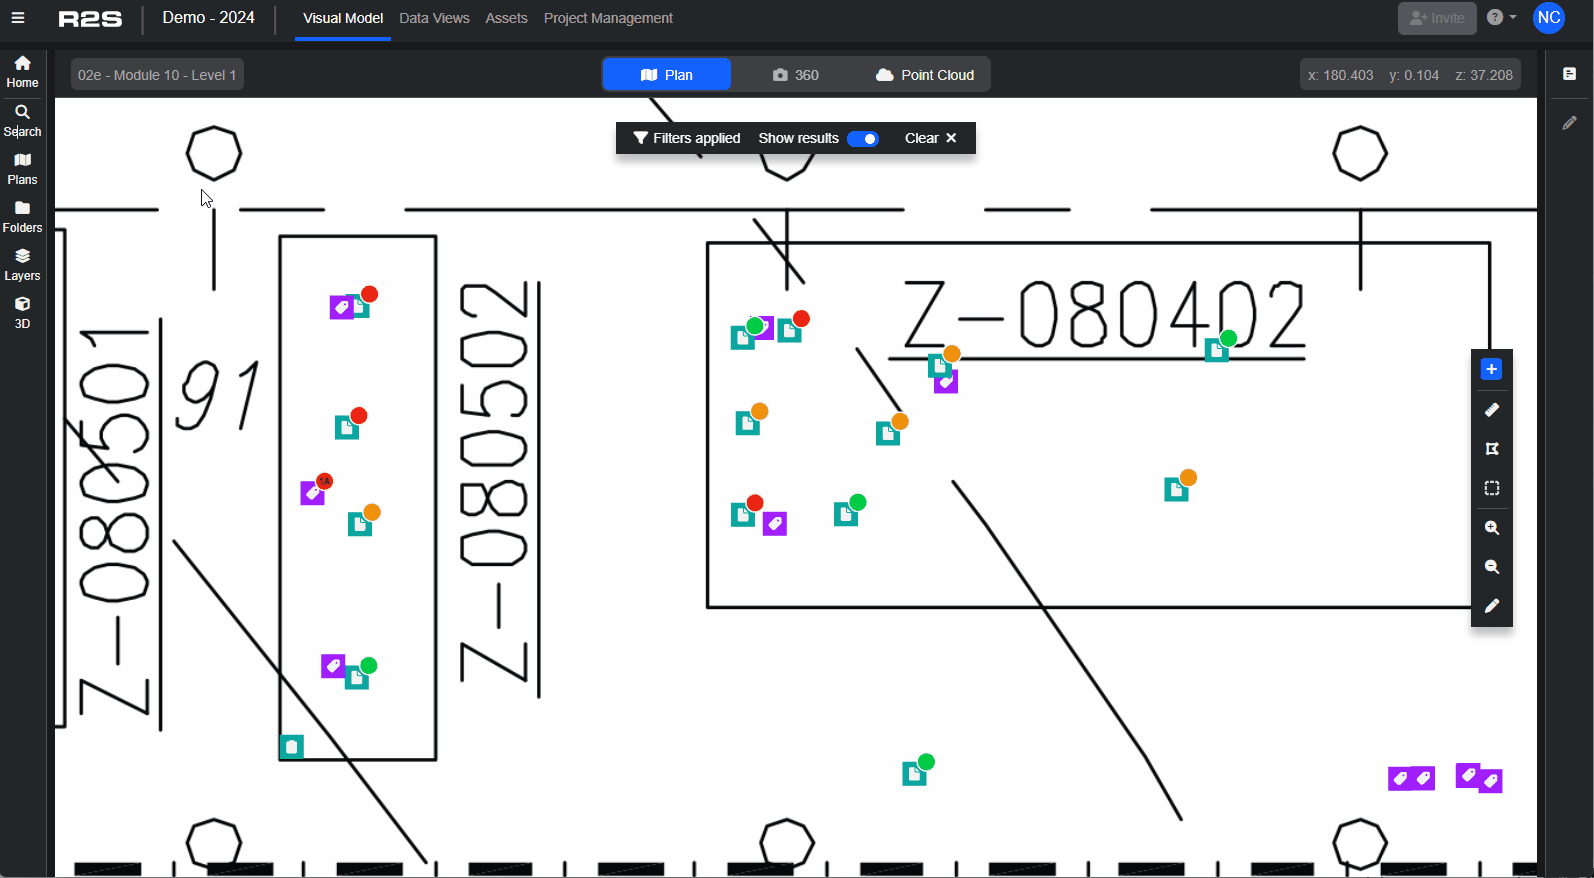
The Filter Panel becomes available when searching Datasets (see Searching).
- Open the Search Panel.
- Select a Dataset from the dropdown menu (or search 'Name and description' for a keyword).
- Click the 'Show Filters' button to open the Filter Panel.

The Filters Panel consists of 2 sections.
Details (1)
Use these predefined filters to quickly refine your search.
- Has Position - filter for items that do/don't have XYZ positions
- Has Attachment - filter for items that do/don't have file attachments (see Attachments).
- Has Linked Item - filter for items that do/don't contains links to other tags
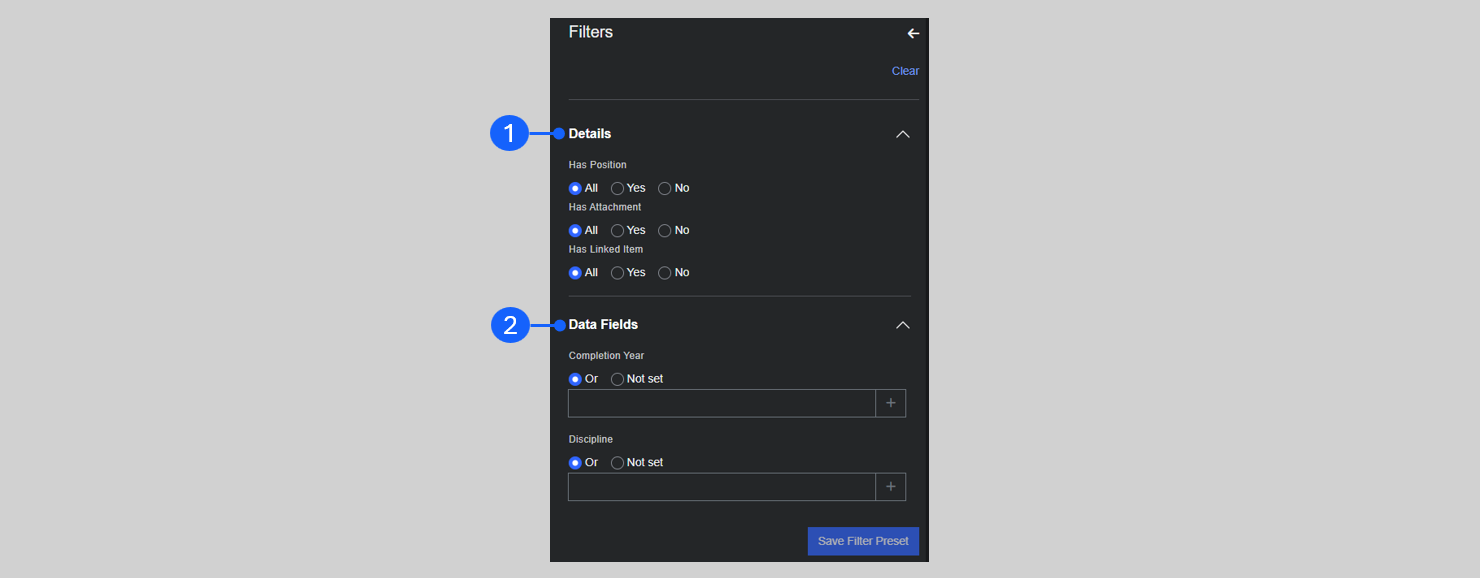
Data Fields (2)
Use this section to filter your search results based on the metadata fields that are available in the Dataset(s). Filtering options vary based on the type of data stored in the metadata field. Here's a few examples.
- Dates : you can search for an exact date (or date range) or use 'Relative Period' to search for predefined period such as "Last 7 days" or "Next 6 months".
- Text: Click on any metadata field and start typing in what you are looking for, a dropdown list will appear. Select the values you are interested in, multiple selections can be made.
- Lists: When selecting a list metadata field, a dropdown menu with predefined options will be displayed. Select one or more items from the dropdown list.
- Numbers: you can search for a specific value by selecting 'Equals' or use "Greater than" or "Less than" to search for a range of numbers.
You can even filter your search results to display tags and tasks that don't have any values entered in their metadata by selecting 'Not set'
Note: If filtering on multiple datasets, only metadata fields that are common to all will be displayed.
Have a look at this interactive guide that walks through an example of filtering an Anomaly dataset to show specific information.
Saving Filters as Presets
After you've applied filters to your tags and tasks to create your ideal view, you can save that setup as a 'Preset'.
- Click 'Save Filter Preset'.
- Add a name.
- Provide a description, this will be helpful if sharing the Preset with other users (optional).
- Choose if you want to share the Preset.
- Private - only you will be able to access the Preset
- Public - all users of the current project will be able to use it.
Now, you can access your saved Presets, including those shared by other users, from the dropdown menu in the Search Panel.
Managing Filter Presets
If you have the Dataset Administrator role, you can access a list of all available Filter Presets for the project that you are in.
- Open the 'Project Management' page from the Project Navbar (see Introduction to the R2S Interface)
- Click on 'Filter Presets'
- A list of all Presets is shown.
- Choose 'Edit' to update the name, description and sharing options.
- Click 'Delete' to remove the Preset from the system.
Note: If you are having trouble using any tool or feature in R2S please contact our support team here.