Tag Panel - Details Tab
Learn what you can do using the Details Tab in the Tag Panel

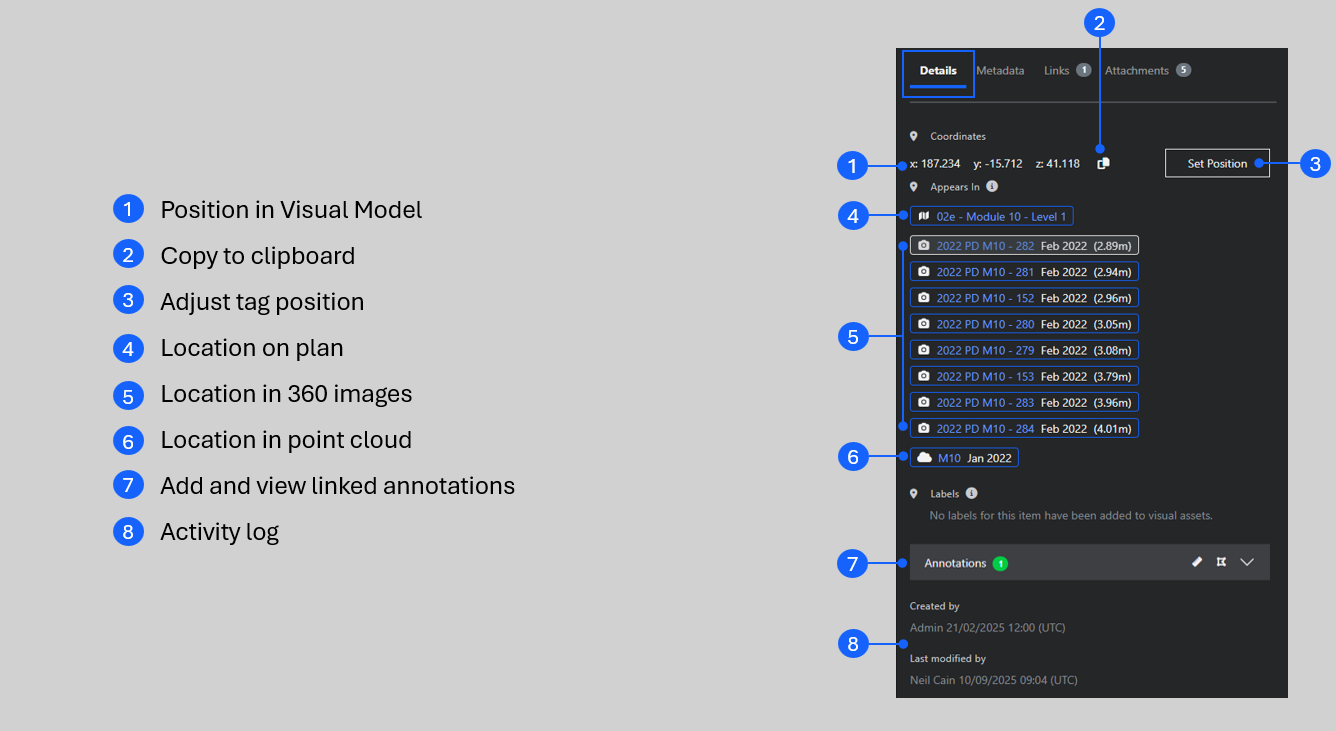
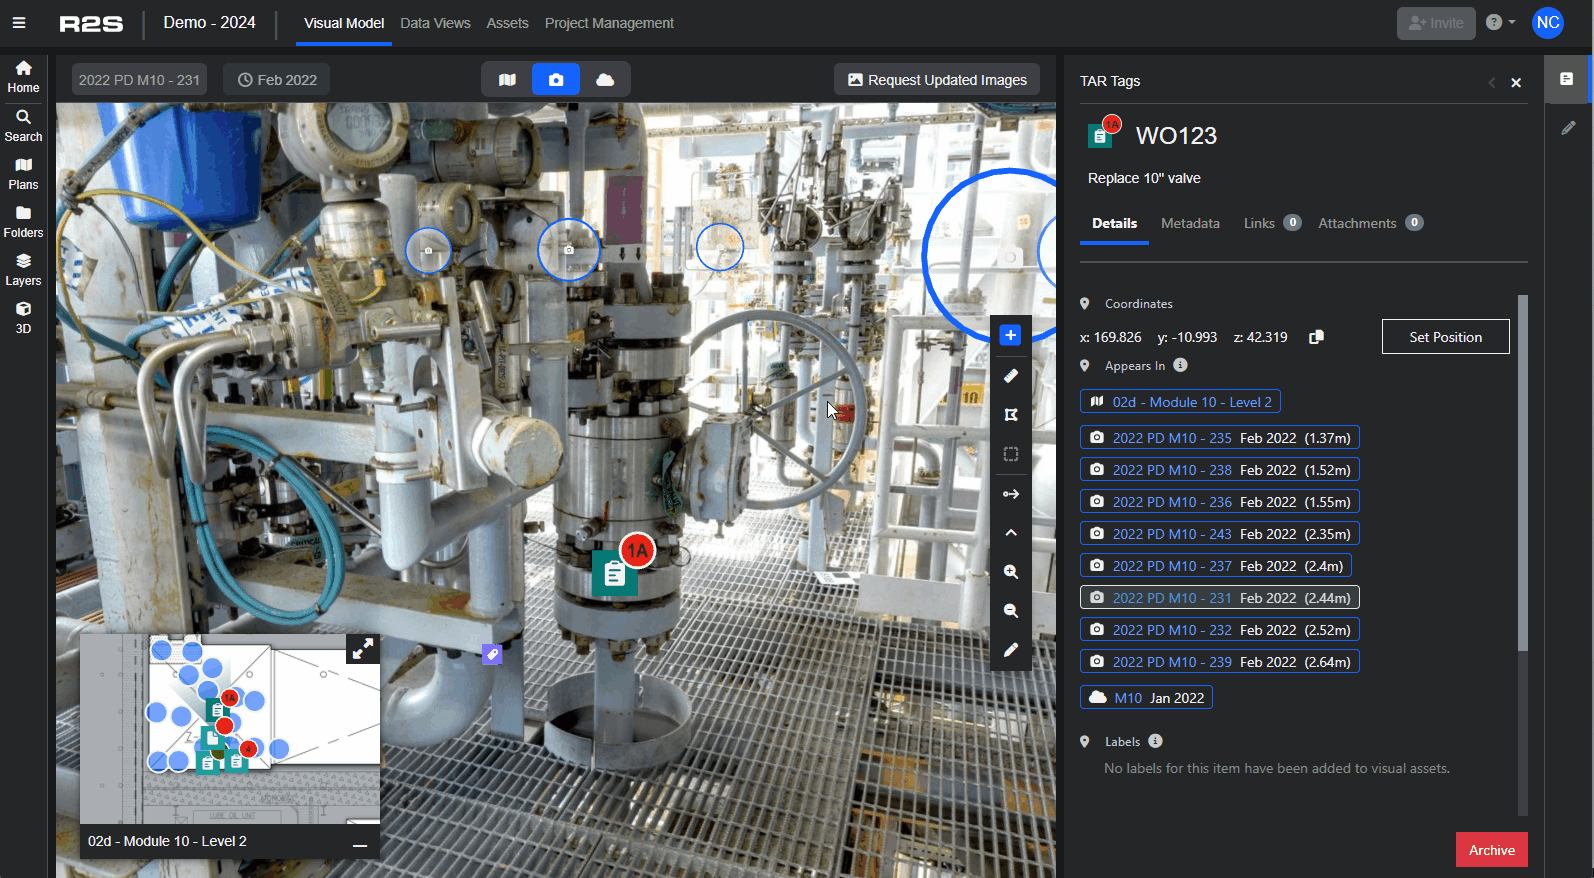
The current coordinate of the tag or task you are looking at is shown here (1), use the copy button (2) to copy the XYZ to your computers clipboard (it's copied in a comma delimited format).
Adjusting Tag and Task Positions.
If you have the Contributor role, you can use the 'Set Position' (3) button to adjust the placement of the hotspot. Options for moving the hotspot depend on the type of image you are viewing.
- All : Type new values into the XYZ boxes or, for fine adjustments, use the up/down arrows.
- Point cloud enabled 360 : Use the scope to select a new position.
- Measurement 360 : Pick a new point by clicking on the same point in the upper and lower images.
- All : Use the grab handles (see below).
Tip: to move a tag or task to a new area of the visual model, navigate to the area first and then click the Set Position button.
Appears in List
Use this list to view the selected hotspot from different perspectives, simply click any location on the list to switch views. From top to bottom, the list is ordered in this way
View on Plan (4)
Opens Plan Mode showing the hotspot at the centre of the view.
View in 360 (5)
Opens 360 View Mode showing the hotspot at the centre of the view. The closest 360 to the hotspot is at the top of the list, the further down the list you go, the further away the 360 view will be from the hotspot. The distance between the 360 and the hotspot is shown in brackets.
See it in action using this interactive guide.
Note: To ensure you're always viewing the most up-to-date images, if 360 images have been captured on multiple dates, the list will automatically reorder to show the newest then closest image first.
View in Point Cloud (6)
Opens Point Cloud View Mode with the hotspot at the centre of the view.
Tip: Now you're in Point Cloud Mode, try selecting different camera positions as above. Notice how you stay in Point Cloud Mode and the view rotates around the tag.
Annotations (7)
Measurements and markups that are linked to the tag or task can be accessed by clicking the down arrow. You can also add new annotations directly to the tag or task from here.
Follow this interactive guide to see how to view linked annotations.
Activity Log (8)
This shows who created and last modified the Tag or Task, and when those changes were made.
For more details and links to additional Tag Panel features, see the Tag Panel – Overview