Measurement (Point Cloud)
Create a measurement in the visual model using the point cloud

How to take a measurement from a point cloud
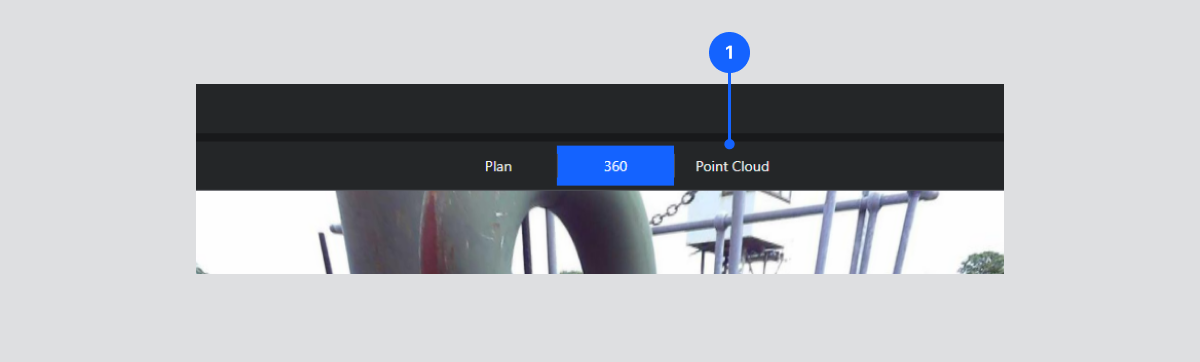
To use the measurement tool, change the view mode to 'Point Cloud' using the display mode bar at the top of the viewer (1).
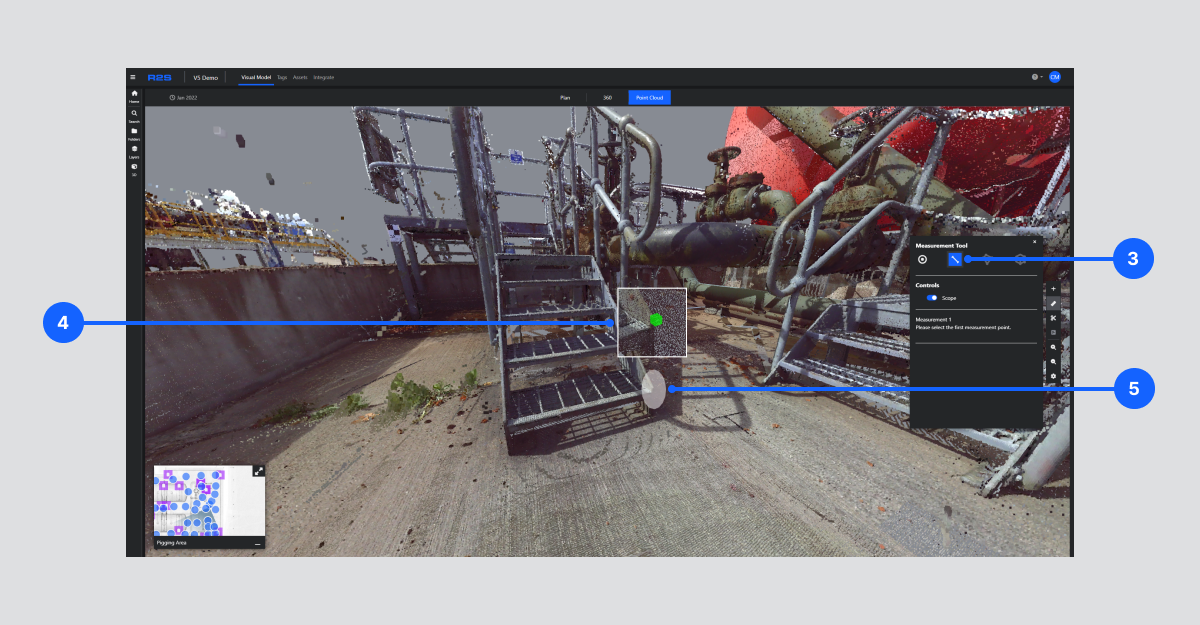
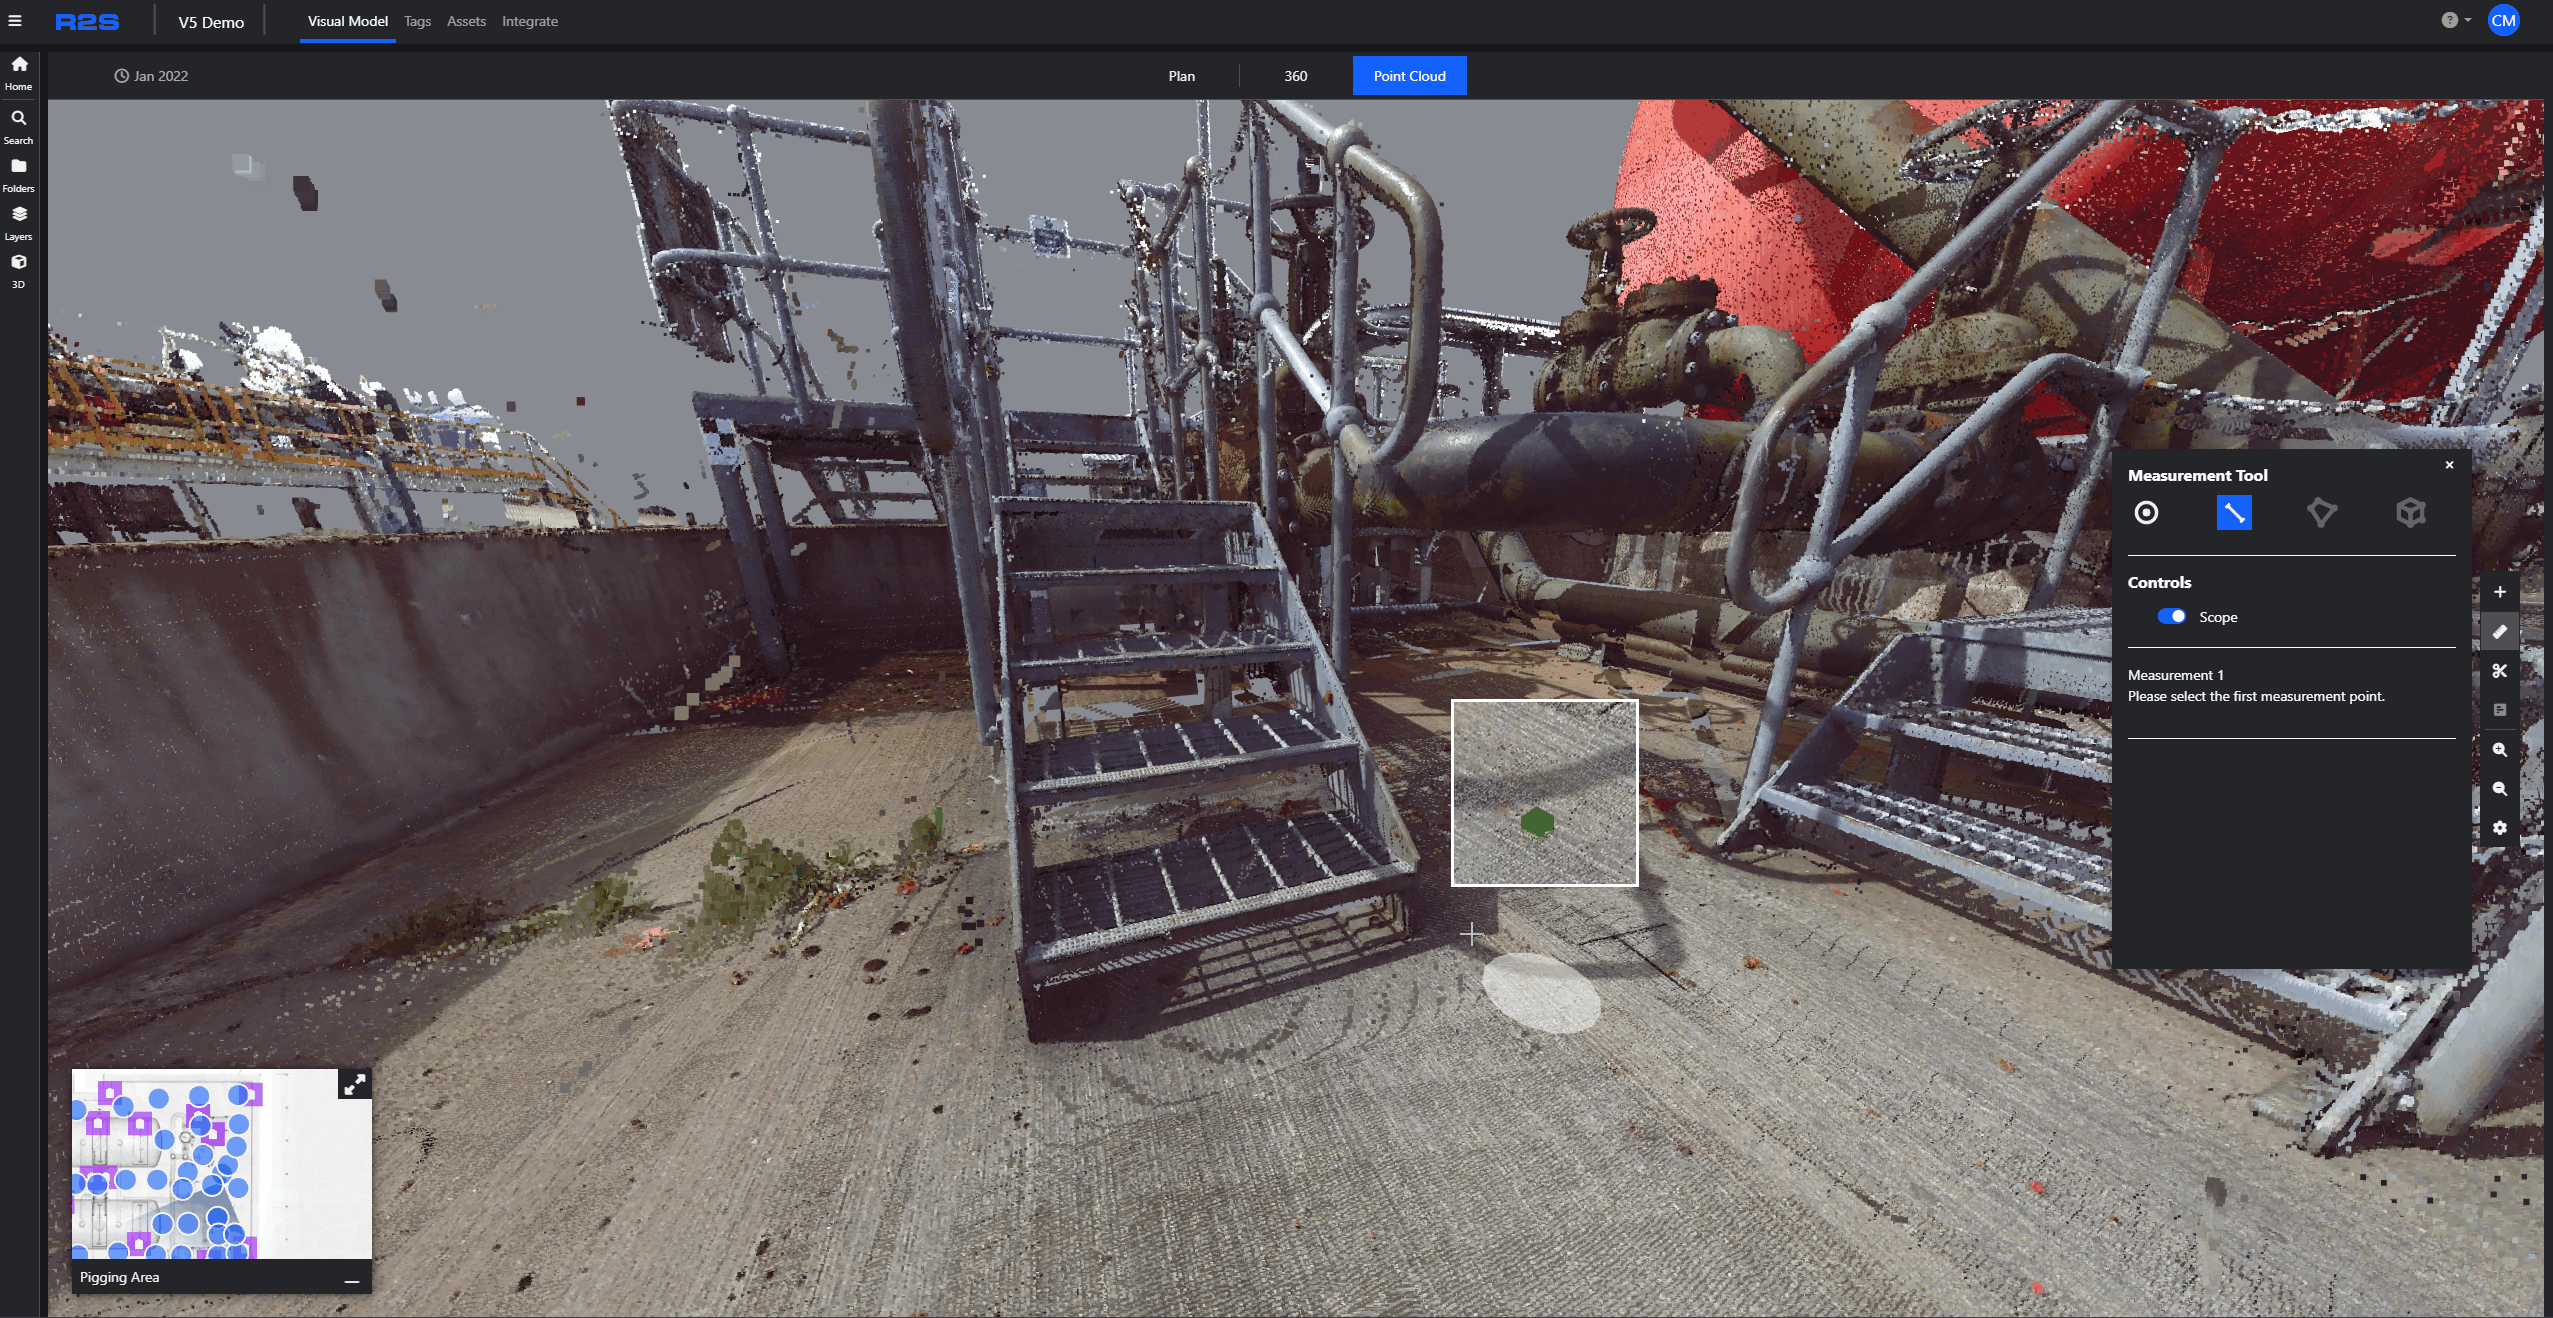
Once in point cloud mode, the ability to create a measurement is available. Select the measurement icon on the toolbar located on the right side of the viewer (2).

The distance measurement tool is the second button in the panel (3). As you move your cursor over the point cloud you will now see a scope (4). This window has a green cube in the center which allows you to see the point you will be selecting.
Where available, you will also see a cursor disc (5) allowing you to see the plane of the surface you are selecting.
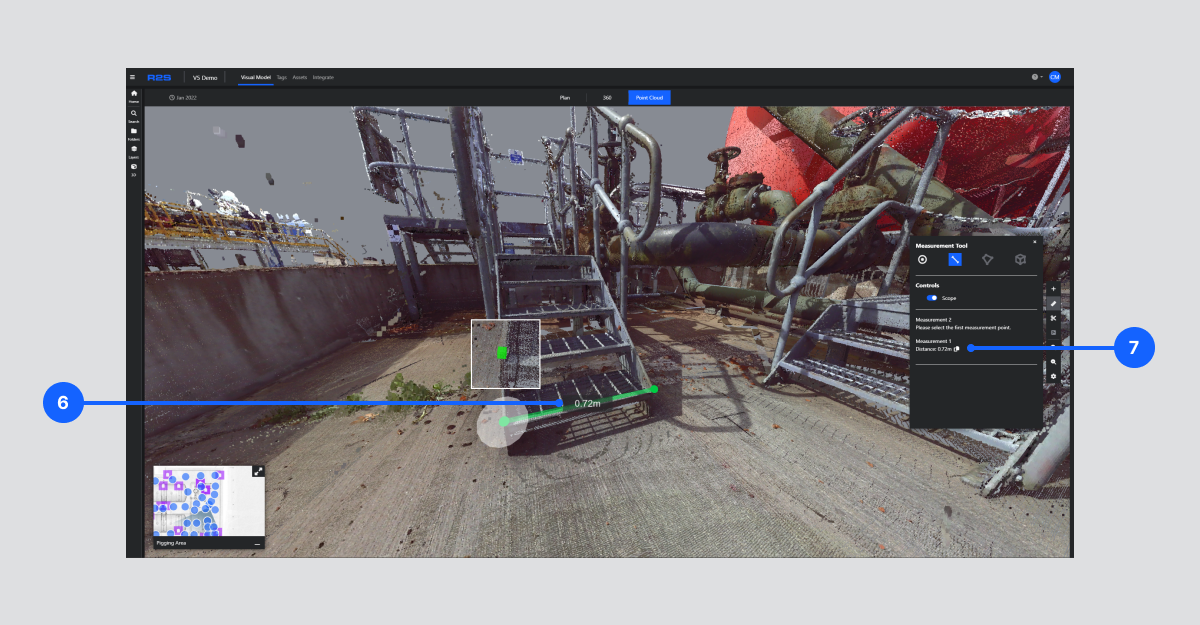
To take a measurement simply click on the initial point and a green dot will appear. When you move your cursor to select a second point, a connecting line which will appear and calculate the measurement as it is placed.
Once you complete a measurement, the measurement will be displayed beside the line and markets (6), and in the measurement panel (7). A ‘copy to clipboard’ button is shown next to the coordinates. This allows you to copy the coordinate and paste it to an external systems.
It is good practice to check around the measurement to ensure the correct points have been selected. To move freely in Point Cloud Mode, use the arrow keys or WASD. Use the Q and E keys to move up and down.
Note: If you are having trouble using any tool or feature in R2S please contact our support team here.